Monthly Archives: July 2013
Vampire Tang
Common Name: Vampire tang, Lieutenant Tang, Doubleband Surgeonfish
Scientific Name: Acanthurus Tennenti
Reef Safe: Yes
Temperament: Semi Aggressive
Care Level: Moderate
Max Size: 10 inches (8 to 9 inches is more common)
Appearance:
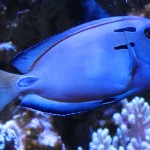
The vampire tang will range in color from light tan to white with an almost black border around the edges of the body. They are also known to have a really nice blue outline around the head and fins. Once the vampire tang reaches adult size, the tailfin will also develop some very nice blue and white coloring and take on a lyre shape. And of course, there are the two dark blue to black markings on the shoulder area just behind the head. As juveniles, they will have a horse shoe shaped marking on their side which will separate into the two dark marking once they start to reach adulthood. These adult markings will also have a very vibrant blue outline to them.
May people find these marking to look like vampire teeth while others will believe the markings look closer to the rank insignia for an army lieutenant. This is how the two most common names for this fish had developed.
Below are a few pictures of my vampire tang. I would guess he is fully grown as he has reached 9 inches in length and has stayed that way for about 2 to 3 years now. My photography skills do not allow me to truly show you how nice this fish really looks. The body on my vampire tang is almost white in color making it hard to me to get a good picture as his body reflects the blue tones of the aquarium lighting which gets picked up by the camera.


Environment and Temperament
Vampire tangs can become semi-aggressive when kept with other tangs of a similar shape, size, and color to them and can also become aggressive with other vampire tangs in the same aquarium. This behavior would be fairly common with most tangs. The vampire tang however is a great fish for a community tank as they will peacefully co-exist with any other types of fish. They are also completely reef safe.
The vampire tang would need an aquarium size of 150 gallons, but would do best in a 180 gallon (or larger) aquarium. The reason for that recommendation is not only based on their average adult size of around 10 inches (give or take), but on their typical behavior as well. They are a very active fish requiring a lot of open swimming space in the tank. This can also make the vampire tang a very entertaining fish to have in a properly sized set-up.
The vampire tang will do best when there are a few suitable hiding spots so they can claim one as their own. As with most tangs, they like to go a hide when they get scared or startled. Having a good amount of live rock in your tank will not only help you to maintain good water parameters, but also provide a more natural environment for the vampire tang.
Recommended water conditions / parameters:
I would refer you to the below article for the typical water conditions that vampire tangs will do best in:
https://www.reefaquarium.com/2013/the-basics-of-marine-aquarium-water-parameters/
Diet
As with most tangs, the vampire tang will accept almost any food you may offer it. However, they are herbivores and will require a diet consisting mostly of sea algaes with some other verities of food on occasion. A good quality flake or pellet food meant for marine herbivores is also a good option for the vampire tang’s main diet.
A reference to consider
https://www.reefaquarium.com/2013/responsible-fish-keeping/
Orange Shoulder Tang
Common Name: Orange Shoulder Tang. Orange Spot Tang, Orange Epaulette Tang, Orangeband Surgeonfish
Scientific Name: Acanthurus Olivaceous
Reef Safe: Yes
Temperament: Peaceful to Semi aggressive
Care Level: Easy
Max Size: 12 inches (9 to 10 inches is more common)
Appearance:
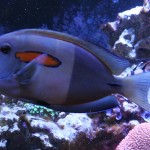
The orange shoulder tang will have a different appearance as a juvenile. When in this stage, they will be mostly yellow in color with very subtle and faint blue highlights. The bar shaped marking on the side of their body will be a shade of orange to brown. Once they have reached adulthood, the front half of their body will turn a very light grey color while the back half will be a darker shade of grey. Their tail will develop a lyre shape to it over time as well. The bar marking on the side will turn to a vibrant orange color as well as developing a blue border around it. They will also develop blue and orange highlights around the edges of their body and fins.
The below pictures are of my orange shoulder tang. I would guess he has reached his fully grown adult size of about 10 inches as he has not grown at all in the past 3 or 4 years


Environment and Temperament
Orange shoulder tangs are the least likely to become semi-aggressive when kept with other tangs of a similar shape, size, and color to them. However, there still is a small risk they can become aggressive with other orange shoulder tangs in the same aquarium if not added at the same time and as juveniles. The orange shoulder tang is the least aggressive tang amount all of the larger bodied tangs common in the hobby. They are also a great fish for a community tank as they will peacefully co-exist with any other types of fish. They are typically reef safe when they are kept well fed.
The orange shoulder tang would to best in a tank size of 180 gallons or more. I would not suggest keeping one in an aquarium smaller than 180 gallons. The reason for that recommendation is not only based on their average adult size of around 10 inches (give or take), but on their typical behavior as well. They are a very active fish requiring a lot of open swimming space in the tank.
The orange shoulder tang will require a few suitable hiding spots so they can claim one as their own if spooked or startled. Having a good amount of live rock in your tank will not only help you to maintain good water parameters, but also provide a more natural environment for the orange shoulder tang as they like to pick at algae as it develops on your live rocks. If you are interested you can check this live rock for sale online.
Recommended water conditions / parameters:
I would refer you to the below article for the typical water conditions that orange shoulder tangs will do best in:
https://www.reefaquarium.com/2013/the-basics-of-marine-aquarium-water-parameters/
Diet
As with most tangs, the orange shoulder tang will accept almost any food you may offer it. However, they are herbivores and will require a diet consisting primarily of sea algaes with some other verities of food on occasion. A good quality flake or pellet food meant for marine herbivores is also a good option for the orange shoulder tang’s main diet.
I have read about people offering lettuce to orange shoulder tangs as a part of their diet. I would not recommend this practice. Although the orange shoulder tang will eat it, lettuce will not offer the same required nutrients as compared to marine algaes.
A reference for you consideration
https://www.reefaquarium.com/2013/responsible-fish-keeping/
Building a Aquarium Stand
Many hobbyists who are also handy with do it yourself projects will build their own aquarium stands allowing for the exact features, measurements, and overall look they want.
I have always built my stands so I could get a larger sump as well as better internal height for more skimmer options. Below are a few aquarium stands that I have built over the years. If you are somewhat handy at wood working and wood finishing, this should be an easy project for you.
Just a few key things to remember
1 – Make sure the complete edge of the aquarium is supported by the frame of the stand.
2 – Make sure there is direct wood to wood contact from the floor directly straight up to the aquarium.
3 – Assemble the frame together using wood screws and wood glue.
4 – Assemble your stand frame on flooring that you know is level and flat.
5 – Always place a peace of ½ to 1 inch thick rigid foam between the aquarium and the stand.
6 – Carefully plan the height of your stand so you can fit all the equipment inside the stand that you may want.
7- Double check the size / opening for the doors to make sure all the equipment you are planning to up in the stand will fit through the doors.
8- Use the below examples and links at the end of this article to help you plan how to build your tank to ensure it can hold the weight of your full aquarium
As these stands need to hold a lot of weight and must be safe, I do tend to over build them at least a little.
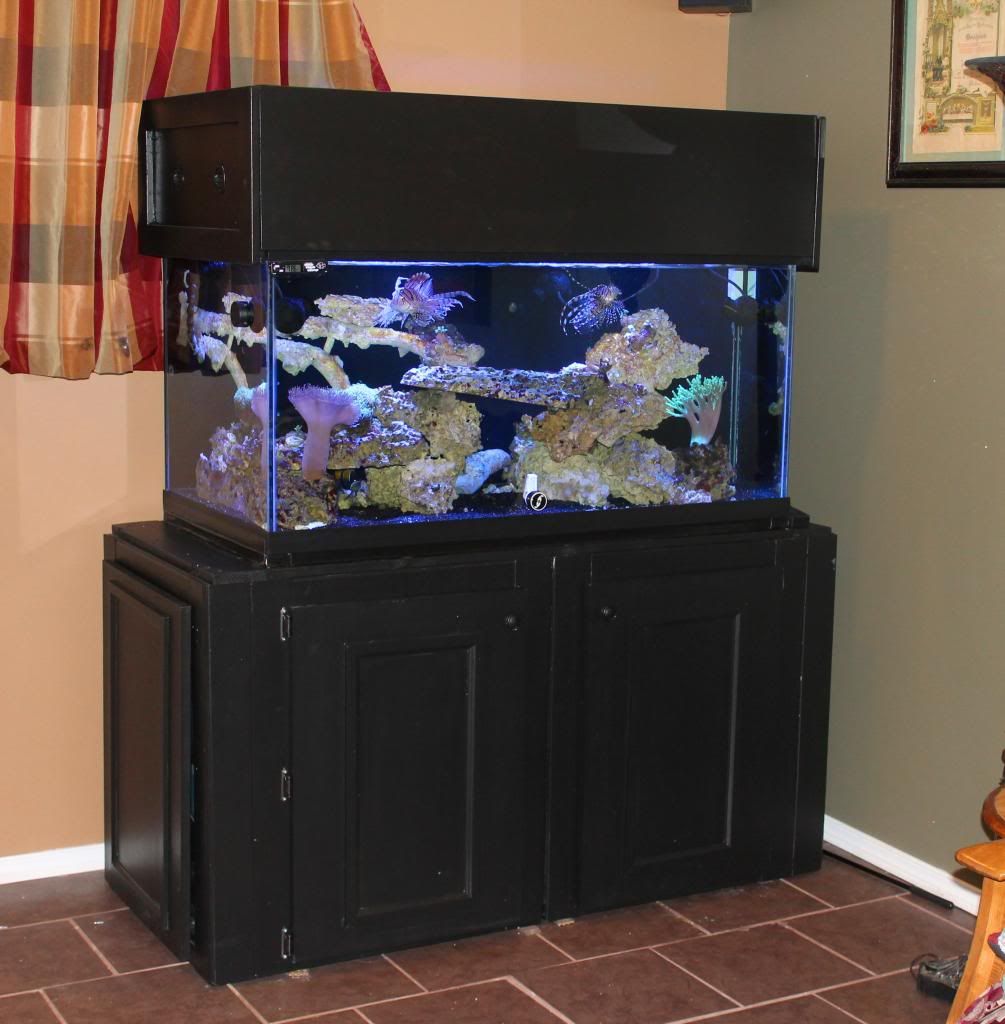
My First Example
The below stand is one that I built for a four foot long 120 gallon aquarium. As I wanted to use a 4 foot long 55 gallon aquarium for the sump, I had to make the stand a few inches longer than four feet. That is why when you look at the below picture of the frame, it will look like it was double framed at both ends.
This is a picture of the frame I built with 2 X 4 peace’s of pine lumber. There were glued together with construction adhesive and screwed with 2 ½ inch construction screws. This is a good example to show what I am referring to when I say direct wood to wood contact from the aquarium frame directly straight down to the floor.

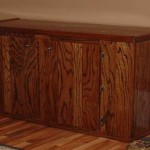
My next step was to cover the frame I made. As I wanted this aquarium stand to match the flooring in the room it was going to sit in, I wanted to cover the frame in ¾ oak. I cut the wood to fit and glued and nailed it to the frame. You can see the openings that I left in the front of the stand for doors to access the sump. The opening on the left hand side is to allow me to remove the sump easily without having to take the tank off the stand. There will also be a door for this end of the stand as well. I left the back of the stand open to allow for greater room when plumbing the sump to the aquarium. I also added some trim to the stand and stained it to match the rest of the furniture in the room it will sit in.


Next I built the all three doors out of the same oak and stained them as well. The whole stand also got 6 coats of the best quality urethane that I could use indoors. I wanted to make sure the wood will be as best protected from moisture that it can be.

Next I moved the stand into place and set-up the entire system.

Once all plumbed and tested, I put the doors on and started to enjoy the aquarium. That stand has now been in use for over two years and has been standing up to the ~1,400 lbs sitting on it as well as the moisture.


I also built a stand for a fresh water sump-less set-up in almost the same way as this first example above. Below are a few pictures of that stand. The biggest difference on the below stand is that I made a solid wood top out of 3/4 inch plywood.


I also used that same design for a stand I built for a older 36 gallon Hagen aquarium that I had a few years back.

As well as using the same stand design for a 33 gallon set-up I put together for my father.

My Second Example
I took a little different approach for my 180 gallon aquarium stand. I doubled up the 2X4s for extra strength. As my sump for this aquarium was going to be in another room, I had no internal height goals to meet, nor did I even need any doors.
The below picture shows the basic frame that I had built. I even added some cross bracing on the up rights along the back and sides of the stand to re enforce the stability.

Next I had to use wood filler on all of the screw holes followed by a lot of sanding. Once sanded, 2 coats of primer and 5 coats of paint were applied before the stand was ready. You can even see the peace of rigid styrofoam on the stand for the tank to sit on.

I then placed the aquarium on the stand, moved it in place, and attached the wood and cloth covers to the openings in the stand. This gave me the look I was wanting. This stand has now been in use for well over a year now and has been able to handle the ~2,200lbs of weight that is sitting on it.


My Third Example
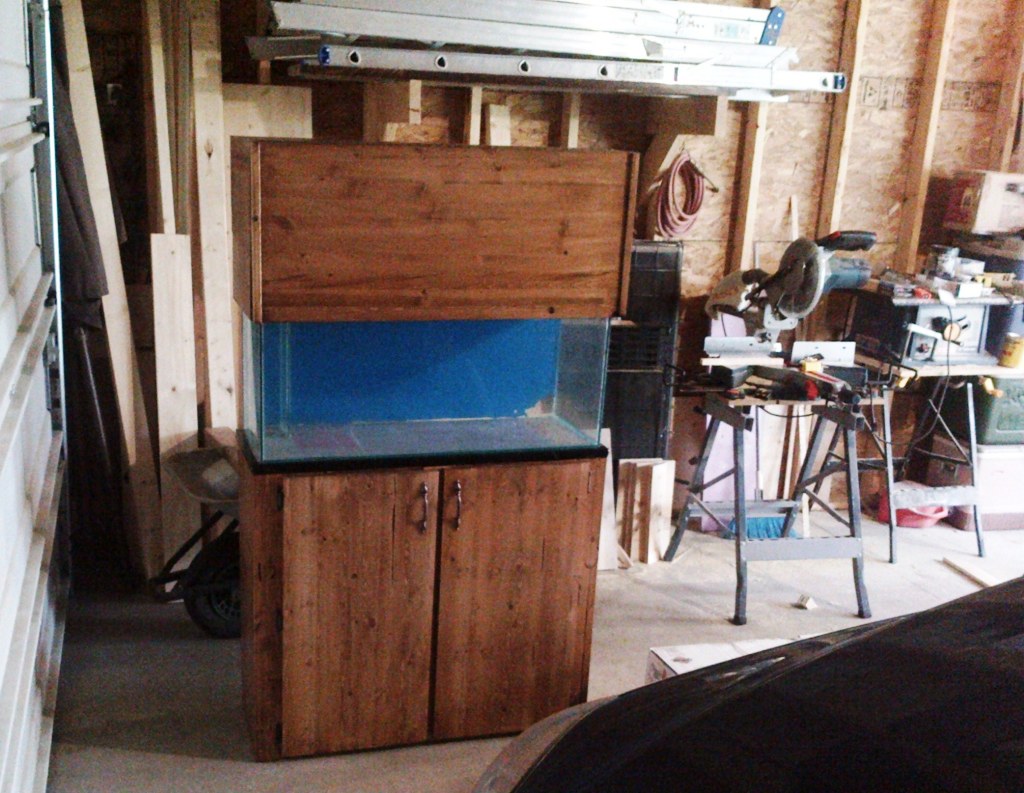
I ran into a very odd challenge with setting up a four foot long, 120 gallon aquarium in our basement. Due to two tight corners, I was limited to the size of stand that I could safety fit through these corners. The problem that I had was that a stand with the required height and width for my sump and skimmer would not fit around those corners. With the hight of the stand being taller than the hight of the aquarium, I could safely move the aquarium down the stairs but not the stand. After giving this a lot of thought, I decided to build a two peace stand that will be held together by a top brace. This would allow me to move the stand down my stairs in two peaces.
I started off by framing each half of the stand. These next two pictures are of the framing. The back of the stand is facing the car in the picture.


The next two are pictures are of the stand after I sheeted it in pine. As I want this stand to have a black finish, I use paint-able wood filler on all the hole and knots in the wood. The opening on the left hand side of the stand is for a large door to remove the sump if I ever need to.


After getting the stand all sanded, primed and painted so I decided to get the top brace peaces cut and make the doors. The below pic shows the top brace peaces sitting in place. The ones on the end were glued & screwed to the top. The ones that run the length of the stand are the ones that hold both pcs of the stand in place
I had to leave a cut out on the back right corner for the drain line. That still leaves 1.75 inches of frame to support the tank in that corner which is more than enough to support the ~1,400 lbs the tank weights. I also wanted a little extra room should I ever need access to the bulk head flange

And one of this stand inplace and in use
The below links can also help you design and plan a aquarium stand
http://www.fishandtips.com/index.php
http://www.knottyplans.com/index.php?page=1001
Some References
http://diyfishkeepers.com/forum/showthread.php?1081-DIY-aquarium-stand
http://www.cichlid-forum.com/articles/diy_stand.php
http://www.aquariumlife.net/projects/diy-aquarium-stand/75.asp
http://www.reefkeeping.com/joomla/index.php/current-issue/article/29-building-an-aquarium-stand
Do I need a UV Sterilizer ???
There are a lot of opposing opinions out there about the use of ultraviolet sterilizers (UV sterilizers) which can make it hard to decide if you would need to add one to your set-up. Hopefully this article can help you think through if you want to use a UV sterilizer or not and make an informed decision either way.
The first step in deciding would be to better understand what a UV sterilizer is and how it works
UV sterilizers are a very simply designed type of a filter. They contain a ultraviolet bulb protected by a water tight quartz sleeve. Water inters the sterilizer and passes over the sleeve becoming exposed to the UV light. The strength of the UV bulb can range anywhere from 9 watts to 100 watts in size. Always stick to a good brand name and follow the manufactures recommend bulb sized based on the total water volume in your set-up. Their also two main different designs, a external style filter that requires water to by pumped through it, and a internal (or completely self contained) style were you just place the filter in your aquarium and plug it in.
UV sterilizers will never: replace biological or mechanical filtration, allow you stop completing water changes, or remove excessive nutrients (nitrates and phosphate).
The second step would be to better understand the purpose of a UV sterilizer
You must first decide what you want to achieve with your UV sterilizer as there are two main purposes for setting up a UV sterilizer each of which better suited to different goals and each require a slightly different approach for use. Other than having a properly sized UV bulb, not fully understanding these approaches is the most common cause of not realizing the potential benefits of a UV sterilizer. This first approach is to help control free floating algae and algae spores. This will best be achieved by a higher flow rate through the sterilizer. As these organisms are smaller, they need less exposure time to the UV light when passing through the sterilizer to become effected by it. The second approach is to control free floating parasites. As parasites are larger in size as compared to bacteria, they will require longer exposure to the UV light which can be achieved by reducing the flow rate through the UV sterilizer. By purchasing a good brand name UV sterilizer and following the manufactured recommendations for flow rates, you will be maximizing the effectiveness of the UV sterilizer in either approach.
The third step would be understand the pros and cons of using a UV sterilizer
Based on my experiences using a UV sterilizer on one of my set-ups as well as what I have read, there can be many pros and cons with using a UV on your marine aquarium. The below are just a few of these pros and cons:
Pros:
-Reduce / control free floating algae and algae spores
-Reduce / control free floating parasites
-Help to reduce the impact of parasite outbreaks, like ick, providing you a better opportunity to treat it.
-Help to keep the water crystal clear and/or eliminate bacteria blooms in the water.
Cons
-They will not remove all parasite as they have to be free floating in order to be effected by the UV
-They will not help with the removal of existing algae in the tank and on the rocks.
-UV sterilizers have been reported to affect some chemical compounds affecting some types of aquarium supplements being dosed.
-They can reduce the diversity of free floating microorganisms which some corals and filter feeders need
-UV filters need to be accurately set-up or they will be useless
-Extra on-going maintenance of cleaning the bulb cover and expense of replacing bulbs every 6 to 12 months
-In most situations, the same benefits of using a UV can also be achieved by other methods
-There will be limited impact on ick as they are only free floating for a smaller portion of their life span.
Whether or not you use a UV can be more of a personal preference which is also based on the exact needs of your set-up as no two marine aquariums will ever be alike.
Aqua C Ramora Nano HOB Skimmer Product Review
Rating Overview:
Overall product rating of: 4 out of 5

Details of my ratings along with the manufacture’s specifications are contained below.
Manufacture Specifications
The below is taken directly from the manufacture’s website: http://www.proteinskimmer.com/
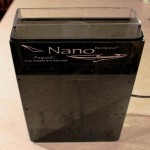
The Remora skimmers are designed to hang on the back of your aquarium, taking up as little space as possible. Driven by a powerful spray-injector, these skimmers are sleek, reliable, and nearly maintenance-free.
–13″ tall x 6″ wide x 2-3/4″ deep
– Minimum tank opening 5-1/4″ x 1-1/2″
– Minimum tank height 7-1/2″
– Minimum space behind tank 2-3/4″
– Maximum tank lip 1-3/8″ wide
– Vertical clearance above tank 10-1/2″
– Includes Maxi Jet 900 pump
– Rated for tanks up to 20 gallons
– Includes nylon cleaning brush
– EPDM o-ring for collection cup adjustment
The below is my own assessment of this skimmer after using it on a few different set-up over the past few years. While this is based on the nano skimmer, most of the information contained below can apply to the larger sized Aqua C Ramora skimmers.
Price Point:
This is a very reasonably priced hang on back (HOB) skimmer. You can typically find these skimmers brand new ranging around $200.00 to $250.00 (with the pump) throughout Canada and the USA. Price will vary based on exact model. Certainly worth the money you will pay for this skimmer. Repair parts also seem very common to find well priced, however, I have never needed to purchase any.
Ease of Use and Set-up
This is a very easy skimmer to take out of the box and set-up. It is pretty close to “plug-and-play” as compared to most other HOB skimmers. Attach the pump, put the cup in, and hang it off the tank. Adjusting the height of the skimmer cup to get the desired thickness of skimmate is pretty straight forward. After three to four days of operation, the skimmer started pulling gunk out of the water and was in really working well after 6 or 7 days.
Overall Size
This is a very great feature of the Aqua C nano skimmer. Most HOB skimmers are bulky and require extra room between the back of the tank and the aquarium. The Aqua C is among the thinnest HOB skimmers allowing you to place the aquarium closer to the wall as compared with most other HOB skimmers. This skimmer also has a low profile to help limit the amount of visible equipment outside of the tank.
Noise Level
This is the biggest drawback to the Aqua C Ramora Nano skimmer. It is just about the noisiest skimmer that I have used. The noise comes from the spray injector part of the skimmer. With a slight modification, you can greatly reduce this noise to what I would call an acceptable level; however, it still has a design that produces far too much noise in my opinion. I have found that placing a small piece of clean cloth soaked in tank water and placed directly on top of the spray injector inside the skimmer will muffle most of the noise. You will need to replace this with a new and clean piece of cloth every few days (or about twice each week). Some people have also reported great success by using paper towel or a piece of foam cut to fit inside the compartment and around the injector as well. In short, this may be a very loud skimmer to operate, but you can do something to reduce that noise level.
Ease of on-going Maintenance
The cup is very easy to remove and clean as well as the pump. I have had very good success with weekly cup cleanings and removing the pump for a good cleaning once every 3 or 4 months. I will also take the skimmer off the aquarium and set it in a pale of 25% vinegar and 75% fresh water and run it over night before manually cleaning the body. This will make cleaning the rest of the skimmer very easy and I will do that about once every 6 months.
Effectiveness of Operation
I have been very happy with how this skimmer has preformed. It does pull a very large amount of skimmate out of the water and typically has consistent performance. Out of the few different HOB skimmers that I have used, the Aquac C Ramora Nano is by far the best performing skimmer within this skimmer size category.
The Aqua C HOB skimmers are a little different than most HOB skimmers as they use a spray injection design as compared with a more commonly found needle wheel design. The pump on the Aqua C will produce enough pressure moving the water through the air induction spray nozzle to produce the bubble/foam which will rise up through the skimmer’s body and pushes the waste into the skimmer cup.
This skimmer comes with the Maxijet 900 pump, which in my opinion is a very good quality pump. Other hobbyists have reported improved performance when up-grading to a Mag 3 pump. I noticed a large improvement in performance when using the Maxijet 1200 on this skimmer. This would be one benefit to the design of the Aqua C remora skimmers as you can increase performance through up-grading to a pump with a higher rated flow capacity.
The only thing that I do not like about this skimmer’s performance is that it can take up to two or three days before the skimmer is working up to its full capacity after a very complete and detailed cleaning.
Likeliness of Recommending this Skimmer to Others
I always have, and will continue to recommend this HOB skimmer to other hobbyists. This is the only HOB skimmer that I have used which I completely agree with manufactures recommendations for tank size. Although the nano version of this skimmer is rated for aquarium sizes of up to 20 gallons, I have been using mine on a lightly stocked 40 gallon aquarium with the up-graded Maxijet 1200 pump. I would have absolutely no concerns using this skimmer on a heavily stocked 20 gallon aquarium as well as slightly larger aquariums if the pump is up-graded.
Below are a few pictures of mine after a routine cleaning. Please note, the skimmer cup lid is not in the picture as I have damaged mine and am waiting for a replacement.


