Tag Archives: DIY Aquarium Stand
Building a Aquarium Stand
Many hobbyists who are also handy with do it yourself projects will build their own aquarium stands allowing for the exact features, measurements, and overall look they want.
I have always built my stands so I could get a larger sump as well as better internal height for more skimmer options. Below are a few aquarium stands that I have built over the years. If you are somewhat handy at wood working and wood finishing, this should be an easy project for you.
Just a few key things to remember
1 – Make sure the complete edge of the aquarium is supported by the frame of the stand.
2 – Make sure there is direct wood to wood contact from the floor directly straight up to the aquarium.
3 – Assemble the frame together using wood screws and wood glue.
4 – Assemble your stand frame on flooring that you know is level and flat.
5 – Always place a peace of ½ to 1 inch thick rigid foam between the aquarium and the stand.
6 – Carefully plan the height of your stand so you can fit all the equipment inside the stand that you may want.
7- Double check the size / opening for the doors to make sure all the equipment you are planning to up in the stand will fit through the doors.
8- Use the below examples and links at the end of this article to help you plan how to build your tank to ensure it can hold the weight of your full aquarium
As these stands need to hold a lot of weight and must be safe, I do tend to over build them at least a little.
My First Example
The below stand is one that I built for a four foot long 120 gallon aquarium. As I wanted to use a 4 foot long 55 gallon aquarium for the sump, I had to make the stand a few inches longer than four feet. That is why when you look at the below picture of the frame, it will look like it was double framed at both ends.
This is a picture of the frame I built with 2 X 4 peace’s of pine lumber. There were glued together with construction adhesive and screwed with 2 ½ inch construction screws. This is a good example to show what I am referring to when I say direct wood to wood contact from the aquarium frame directly straight down to the floor.

My next step was to cover the frame I made. As I wanted this aquarium stand to match the flooring in the room it was going to sit in, I wanted to cover the frame in ¾ oak. I cut the wood to fit and glued and nailed it to the frame. You can see the openings that I left in the front of the stand for doors to access the sump. The opening on the left hand side is to allow me to remove the sump easily without having to take the tank off the stand. There will also be a door for this end of the stand as well. I left the back of the stand open to allow for greater room when plumbing the sump to the aquarium. I also added some trim to the stand and stained it to match the rest of the furniture in the room it will sit in.


Next I built the all three doors out of the same oak and stained them as well. The whole stand also got 6 coats of the best quality urethane that I could use indoors. I wanted to make sure the wood will be as best protected from moisture that it can be.

Next I moved the stand into place and set-up the entire system.

Once all plumbed and tested, I put the doors on and started to enjoy the aquarium. That stand has now been in use for over two years and has been standing up to the ~1,400 lbs sitting on it as well as the moisture.


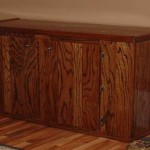
I also built a stand for a fresh water sump-less set-up in almost the same way as this first example above. Below are a few pictures of that stand. The biggest difference on the below stand is that I made a solid wood top out of 3/4 inch plywood.


I also used that same design for a stand I built for a older 36 gallon Hagen aquarium that I had a few years back.

As well as using the same stand design for a 33 gallon set-up I put together for my father.

My Second Example
I took a little different approach for my 180 gallon aquarium stand. I doubled up the 2X4s for extra strength. As my sump for this aquarium was going to be in another room, I had no internal height goals to meet, nor did I even need any doors.
The below picture shows the basic frame that I had built. I even added some cross bracing on the up rights along the back and sides of the stand to re enforce the stability.

Next I had to use wood filler on all of the screw holes followed by a lot of sanding. Once sanded, 2 coats of primer and 5 coats of paint were applied before the stand was ready. You can even see the peace of rigid styrofoam on the stand for the tank to sit on.

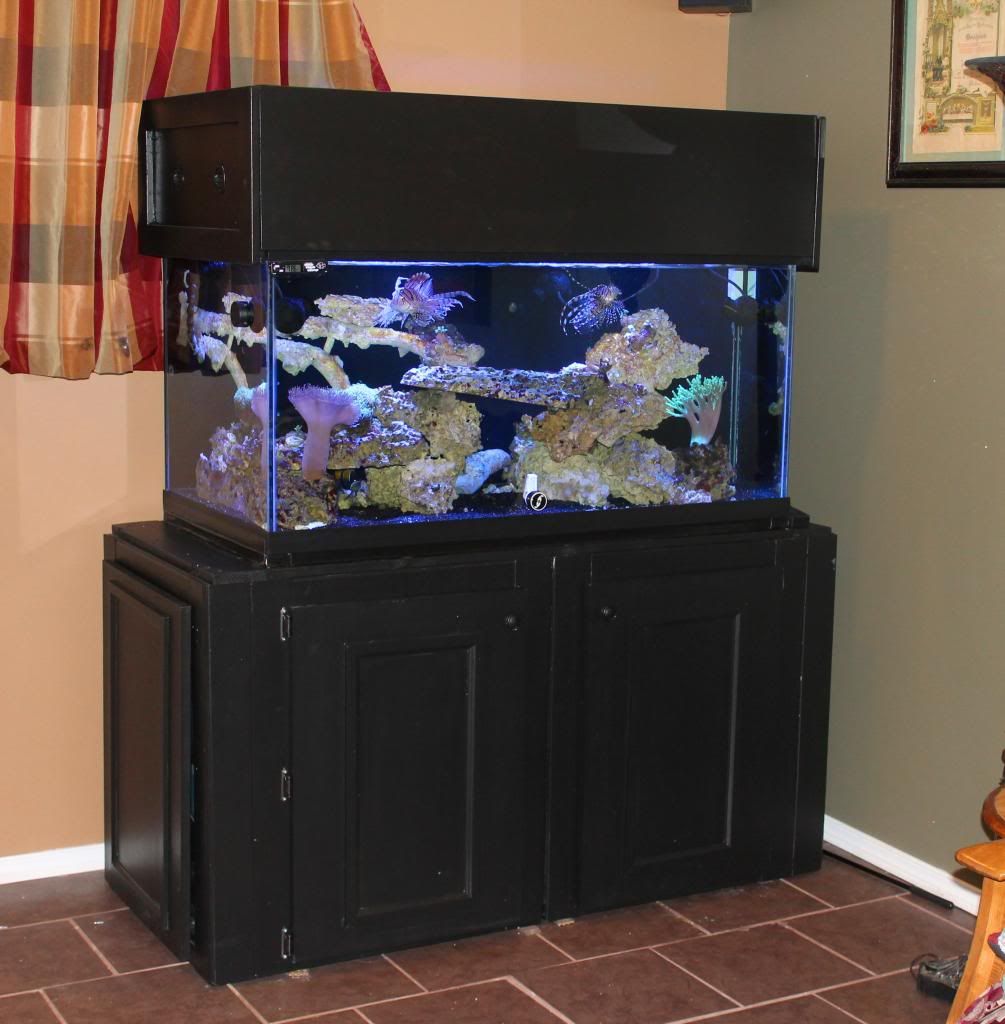
I then placed the aquarium on the stand, moved it in place, and attached the wood and cloth covers to the openings in the stand. This gave me the look I was wanting. This stand has now been in use for well over a year now and has been able to handle the ~2,200lbs of weight that is sitting on it.


My Third Example
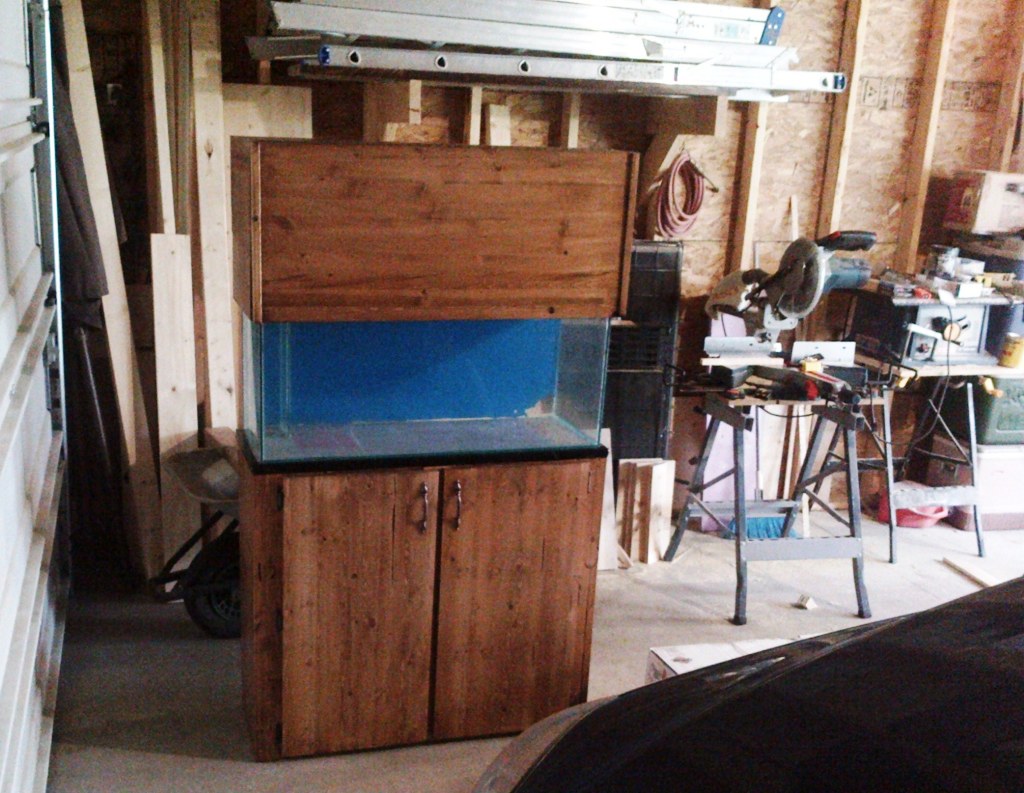
I ran into a very odd challenge with setting up a four foot long, 120 gallon aquarium in our basement. Due to two tight corners, I was limited to the size of stand that I could safety fit through these corners. The problem that I had was that a stand with the required height and width for my sump and skimmer would not fit around those corners. With the hight of the stand being taller than the hight of the aquarium, I could safely move the aquarium down the stairs but not the stand. After giving this a lot of thought, I decided to build a two peace stand that will be held together by a top brace. This would allow me to move the stand down my stairs in two peaces.
I started off by framing each half of the stand. These next two pictures are of the framing. The back of the stand is facing the car in the picture.


The next two are pictures are of the stand after I sheeted it in pine. As I want this stand to have a black finish, I use paint-able wood filler on all the hole and knots in the wood. The opening on the left hand side of the stand is for a large door to remove the sump if I ever need to.

After getting the stand all sanded, primed and painted so I decided to get the top brace peaces cut and make the doors. The below pic shows the top brace peaces sitting in place. The ones on the end were glued & screwed to the top. The ones that run the length of the stand are the ones that hold both pcs of the stand in place
I had to leave a cut out on the back right corner for the drain line. That still leaves 1.75 inches of frame to support the tank in that corner which is more than enough to support the ~1,400 lbs the tank weights. I also wanted a little extra room should I ever need access to the bulk head flange

And one of this stand inplace and in use
The below links can also help you design and plan a aquarium stand
http://www.fishandtips.com/index.php
http://www.knottyplans.com/index.php?page=1001
Some References
http://diyfishkeepers.com/forum/showthread.php?1081-DIY-aquarium-stand
http://www.cichlid-forum.com/articles/diy_stand.php
http://www.aquariumlife.net/projects/diy-aquarium-stand/75.asp
http://www.reefkeeping.com/joomla/index.php/current-issue/article/29-building-an-aquarium-stand