Category Archives: Reef
Some Basic Guidlines for LED Lighting in Aquariums
When looking at getting LED lighting for your aquarium, it can seam overwhelming when considering all the features and options that you will have to choose from. However, it doesn’t have to be all that difficult if you keep it simple. I have learned that applying a few simple concepts, or rules of thumb, LED lighting become a whole lot easier to understand. The below is what I have learned. This is not and all inclusive set of instructions, just something simple to get you started if you have no experience with LED lighting. Most people do not pay attention to the angle of the lenses used or do not understand how different the wattage can be with a LED diode (as compared to a T5 or T8 bulb) and they end up with a fixture that really will not meet their long term needs.
I have included some simple guidelines for both fresh water and marine environments so you may also have a few other points of comparison.
- For tanks that are 36 to 48 inches long and 12 to 24 inches tall, I would suggest a fixture that is about 6 to 8 inches wide (or even a little wider) – For a 48 inch long fixture you should have around 30 to 40 1 watt LEDs, either Cree or Apollo manufactured LED diodes.
- For a 36 inched tank, about 25 to 30 1 LED just as mentioned. This would give you the options for easy to keep and some of the moderately depending plants.
- Get a fixture with about 20% more LEDs if you think (or are planning) that want more demanding plants in the future or corals for a marine set-up.
- If you are putting this fixture on a freshwater set-up, then choose LEDs with a color temp of less than 7,000K. -If you are putting this fixture on a marine tank, then choose LEDs with a color temp of higher than 12,000K, 18,000 to 20,000K is best.
- For a fresh water set-up you can add a few red or Fugi pink colored LEDs if you want to help the colors in your tank “pop”
- For a marine set-up you can add a few Fugi pink or actinic LEDs you want to help the colors in your tank “pop”. You can also have a 50/50 mixture of 12,000 to 18,000K white and 22,000K or higher blue LEDs and still support coral growth (most corals) while helping to limit algae.
- Add a controller to adjust the intensity of the light if you want. Many different manufactures make the LED controllers differently with a lot of different options. You should research this carefully so you know what you can and cannot control.
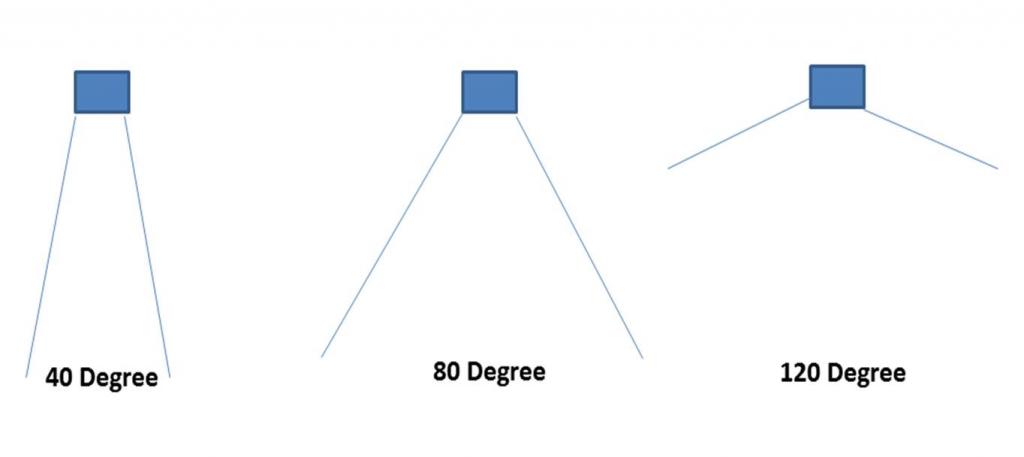
- For lenses, I would suggest a mixture of about 50% of the lenses around 40 to 60 degrees, the rest around 60 to 80 degrees. This will determine how much light intensity will be reaching the bottom of the tank and is just as important, if not more important, than the wattage of the LEDs themselves. The below simple diagram (not to scale) can help you better understand what I am talking about
I hope you have found this information useful You can also read through the below link for some additional information on reef aquarium lighting https://www.reefaquarium.com/2012/reef-lighting-2/
The below link also contains a lot very information as well
http://www.advancedaquarist.com/blog/2013/2/aafeature
How to Frag Leather Corals
A good friend and fellow hobbyist asked me for a frag from one of my corals that he has really liked for a while now. As I was getting the frag for him, I thought I would take the time to show how I prefer to frag leather corals.This is not the only way to frag a coral, but it is the way that I find the easiest for both me and the coral.
Step – 1 Plan the frag
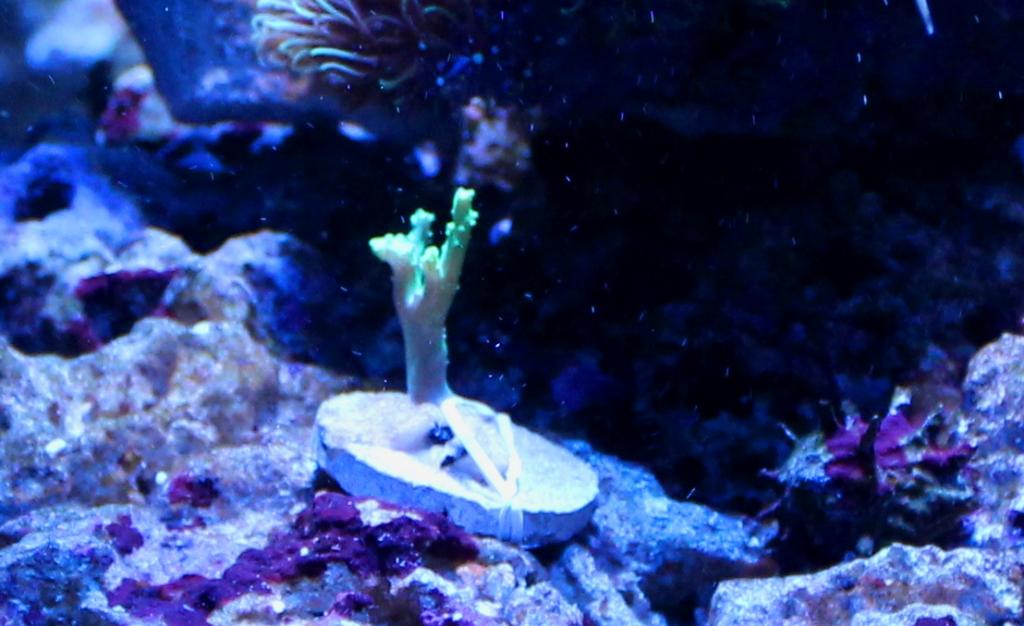
By this I mean you should decide what part of the leather you want to frag. In this instance, there is a small growth near the base of the blue mushrooms coral on the left hand side (as pictured below). I could have chosen almost any part of this leather to frag and it really would not have mattered too much, but that small growth just seamed it would be easier to frag.
Step Two – Remove and Frag the leather
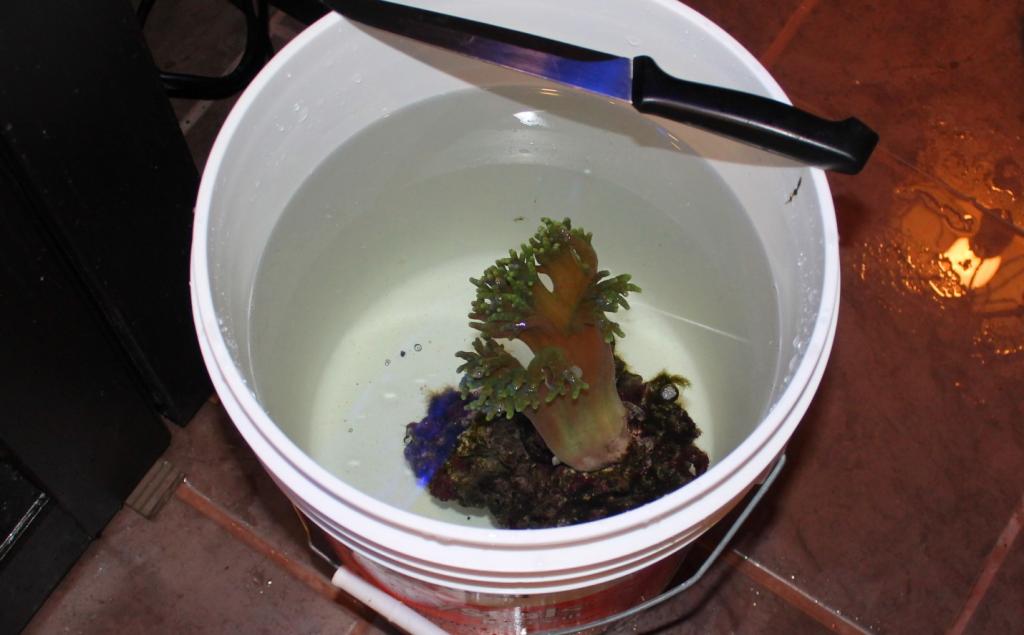
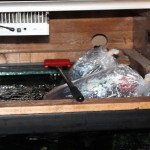
It is always best if you can remove the leather from the aquarium when you frag it. In this case I had removed the leather and the rock it was sitting on and placed it in a 5 gallon pale of tank water.There are two reasons for doing this. The first is that leathers can release toxins when being fragged, and the second is that you can add a coral treatment to the container to help the coral heal faster.Many others have successfully fragged leathers while still in the display tank.I have always been able to remove mine for fragging so I have always done that.
Step three – Frag it
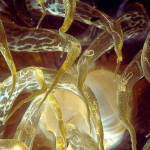
This is simply cutting a part of the coral off from the rest of the coral. Make sure you use a very sharp razor or butcher’s knife and cut the peace off in one smooth and gentle motion.Remove the frag to a second container of water and leave the leather in the current container. Add a good quality coral treatment to both containers to help the corals heal the damaged areas. Once the main coral has had about 10 minutes in the coral treatment, you can replace it to your main display tank. I would also suggest having fresh carbon running on your set-up to remove any toxins the leather might release.
Step four – Attach the frag
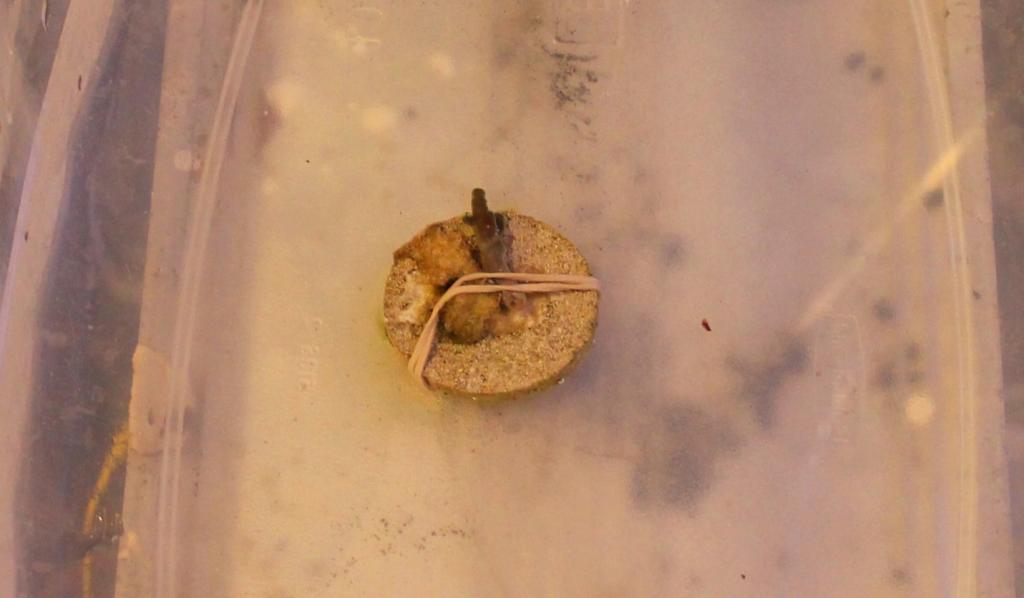
In my experience, you have to let leathers naturally attach themselves to something.Every time I have tried an approach that involved glues or any other type of method, I found the leather will just produce extra slime coating and become detached within a day or two. I have the best success by using a rubber band to gently hold the frag to a frag plug or piece of rock. You want just enough pressure to hold the frag in place, any more and you could cause the frag to divide into two smaller pieces and both becoming detached.
You don’t have to worry about attaching the frag so it sits up-right as it will grow up-wards towards the light in no time at all.
Step 5 – Return the frag
I always like returning the frag to the display tank as soon as it had about 10 minutes in the other container with a coral treatment. I will place the frag in a lower area of the aquarium with low flow to help the leather attach to the frag plug. In my experience, it takes about two to three weeks for the frag to attach to the plug assuming it is not getting stressed by crabs (or other critters) and it’s lighting and water quality needs are being met.
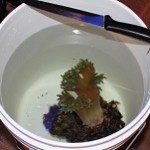
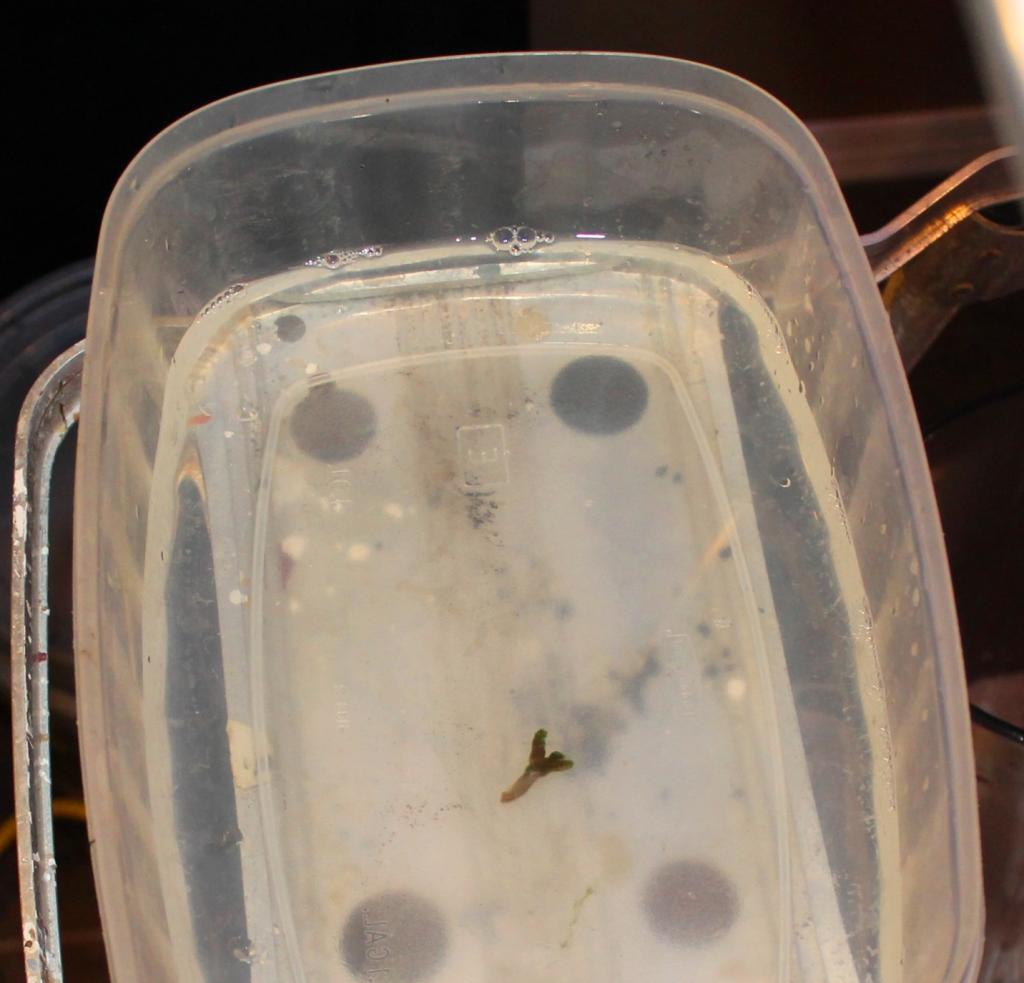
The below picture of the frag was taken after one day after being fragged
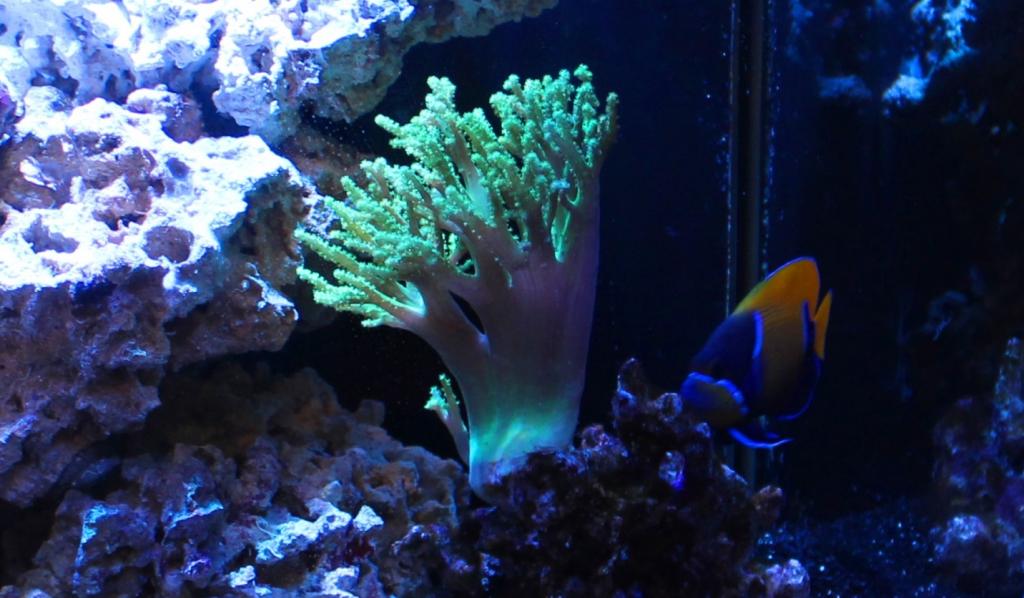
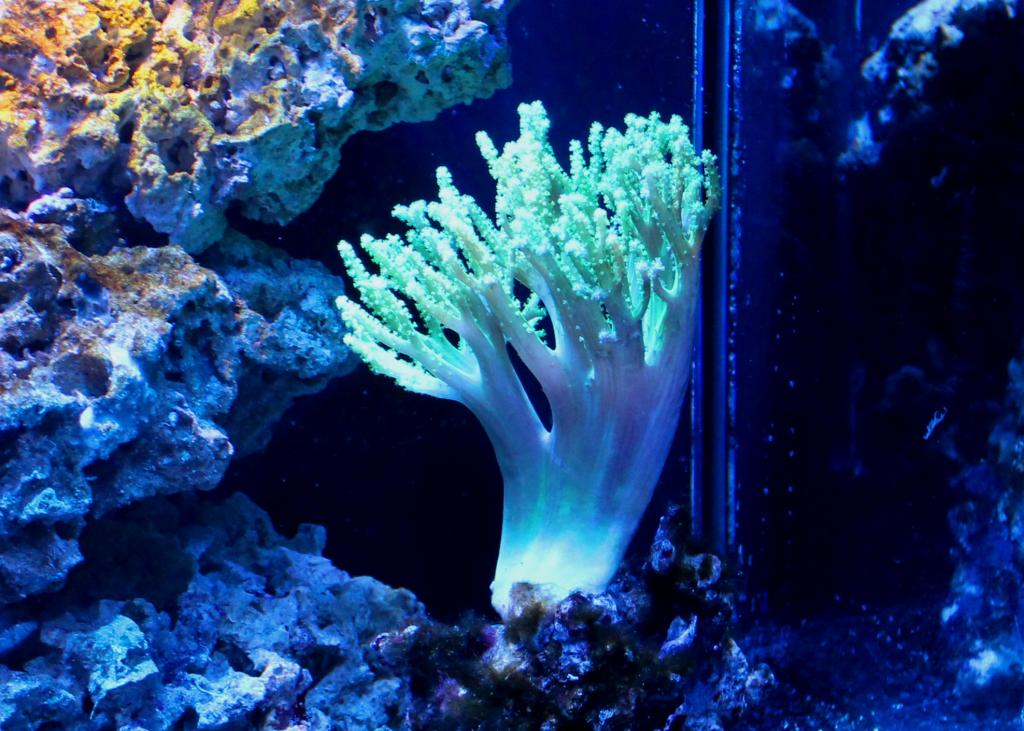
The below was taken four days after being fragged. You can see the leather is starting to turn up-wards towards the light and is also starting to extend its polyps.

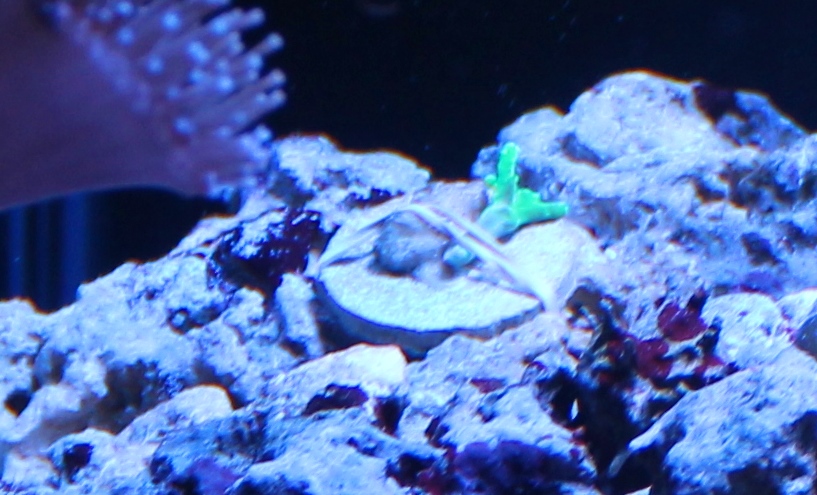
The below picture was taken 9 days after being fragged. The frag has already started to grow up-wards towards the light and looks like it is very close to becoming attached to the coral plug/
The next day after being fragged, the main leather has fully bounced back recovering from the process and looks to be in pretty good shape.
Acclimating Corals
In my experience, corals need to be acclimated, just as fish or inverts would need to be when adding them to your aquarium.The below process is what I would typically follow when acclimating corals to my tank.Although I do not quarantine my corals, I will give them a preventative treatment dip to rid them of potential hitch hikers.I also carefully inspect any coral before purchasing it when I buy it from a store or even from another hobbyist.If I do notice hitch hikers on the coral, or the tank the coral doesn’t look healthy to me, I will not buy the coral.This is also the reason why I do not like to buy corals on-line as I want to personally inspect the coral before I decide to buy it. If you do choose to quarantine your corals, I would suggest to use the below process to acclimate the coral to your quarantine tank repeating the same process when you move the coral to your display tank.
Step 1 – Float the bag
I will keep the bag I got the coral in closed and let it float in tank water for about 30 to 45 minutes allowing the temp of the water in the bag to become the same as the tank water.If I am floating the bag in the tank, I will lower the lighting level to about 10% of normal.Most of the time I will float the bag in the sump were the lighting level will be very low just so I do not have to change the lighting in my tank more than what I have to
Step 2 – Remove the coral and water
Once I am confident the temp of the water in the bag matches the tank water, I will remove the coral and the tank/bag water from the store and place them both in a separate container. I have a few different sized containers that I use to accommodate different sizes of corals and different amounts of water.
Step 3 – Acclimate the coral to your water parameters
Now that I have the coral in a different container with the tank water from the store, I will start adding tank water to this container. I will typically add about ½ cup of water about every five minutes or so. Once the container has become full, I will remove and discard about half the water from the container so I can continue adding water from my tank to this container. I will repeat this about three times or until I am comfortable that I have replaced all of the water from the store with water from my tank
Step – 4 Observation
While I am adding water from my tank to the container with the new coral in it, I will be carefully watching the coral for any hitchhikers.
Step -5 Treatment dip
I will always give the corals a preventative treatment with a coral dip before placing them in my display tank.The below is the coral dip that I like to use. Just make sure that whatever coral treatment dip you choose that you careful follow the instructions on the bottle.If I noticed any hitch-hikers while acclimating the coral to the tank water, I will ensure they are removed / killed off by the coral treatment dip.If I see any harmful SPS crabs, I will get a pair of tweezers and manually remove them as these crabs are very hardy and some of them can survive the coral treatment dip.
I can not stress the importance of using a coral treatment dip enough. I once skipped this step and introduced flat worms into my tank. It took me a very very long time and a lot of effort to get the flat worms under control.I will never make that mistake again.So far, I have been very successful keeping hitch hikers out of my tank by using a coral dip.
Step 6 – Add the coral to the tank
Once I am confident the treatment has removed any potential hitch hikers, I will lower the lighting level in the tank to about 1/3 of normal (if not already lowered). Next I will remove the coral from the current container and place it in a second container of water that I just removed from my display tank.The reason for this is to remove any trace amounts of the coral treatment before placing the coral in my tank.I will gently swish it around a little in this second container before removing the coral by hand and placing it in my display tank.All corals will initially be placed on the bottom of my tank
Step 7 – Acclimate the coral to my tank lighting
Now that the new coral is in the tank at a lower lighting level, I will leave the lighting at this current level for a few hours.I will slowly increase the lighting level back to its normal level over the next 2 or 3 hours.Before switching to LEDs, I would place 4 or 5 layers plain of white paper on top of the tank lids to block out some of the light and slowly remove one layer at a time allowing more and more light to get to the tank.
The next day, once the tank lights are on at their normal setting, I will place the coral in its intended spot.If the coral is a sensitive or high light demanding coral requiring it to be placed higher in the tank (closer to the lights), I will take a few days to move it up to its intended spot, placing it a little higher on the rocks until it has reached its intended spot.
NOTE: I will never add any of the water that I used to acclimate a coral back into my tank.Once I am done acclimating the coral, I will top up my tank with some freshly made salt water to replace what I had removed during the acclimation process. I will always discard all water used to acclimate a coral.
Aiptasia Anemones
What is Aiptasia
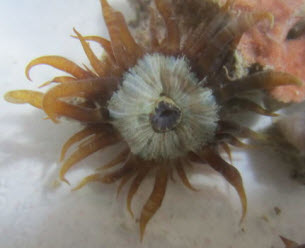
Aiptasia anemone. Picture by Smithsonian Institute.
Aiptasi sp is a type of pest anemone that infest reef aquariums and it should although beautiful be removed from an aquarium as soon as possible. The longer it takes to start treatment the worse the infection will be. Aiptasia is most often introduced to an aquarium with live rock. The most common species in aquariums is Aiptasia pallida but other species are also regularly introduced.
It is common that beginner reef keepers anxiously is observing their live rock to see what types of life it might have brought with it. One day they see a small baby polyp. The right thing to do at this point is usually to remove it since most polyp hitch hikers are either Aiptasia or the equally problematic Majano Anemone. Most reef keepers do however want to see what it develops into and before long they are the happy owners of a beautiful anemone. Fast forward in time and the reef keeper will before he knows it have a rapidly growing Aiptasia colony and start to realize that he has a problem. At this time it is a lot harder to get rid of the Aiptasia than it would have been if it had been removed straight away. It is therefore important to try to identify any polyp and anemone you see as early as possible. You can read more about identifying Aiptasia further down in the text.
In the wild Aiptasia is a common sea anemone found in temperate and tropical waters. They live in the benthic zone where they can be found growing on mangrove roots and hard surfaces. Many species of Aiptasia contain symbiotic dinoflagellate unicellular algae of the genus Symbiodinium living inside nutritive cells. The algae helps the Aiptasia by providing fats and sugars produced through photosynthesis. In return the Aiptasia provides protection and inorganic nutrients. Some species that feeds on Aiptasia such as the Berghia nudibranch absorbs these algae and benefit from the symbiotic relationship. The algae do however normally survive less than one week after having been absorbed by Berghia nudibranches.
Aiptasia species are hardy and beautiful but they are still considered aquarium pests and it is easy to see why. The Aiptasia is very fast growing and aggressive. If left alone they can quickly out compete everything else living on the live rock. They have stinger cells (filled with nematocysts ) filled with a very potent poison that cause corals and other polyp animals to retreat The Aiptasia is also capable to kill corals, shrimp, crabs, snails and even fish. It is not very common that Aiptasia kills fish or desirable invertebrates but the risk is more than serious enough to warrant their immediate removal and the risk get higher the more the Aiptasia is allowed to spread. Aiptasia stings for both offensive and defensive purposes.
Aiptasia is very hard to remove once established due to their ability to regrow from very small segments left on the rock after the removal of the poly. Each of the small segment regrows into a new polyp. Aiptasia can sometimes regrow from one single cell left on the substrate after the removal of the rest of the polyp.
Identifying Aiptasia
 It is important to identify Aiptasia as early as possible so that treatment can start as early as possible. It is also very important to identify Aiptasia correctly if you want to use biological methods to control the Aiptasia. Berghia nudibranches will as an example only eat Aiptasia and not Majano Anemones. Another type of very common aggressive pest anemone.
It can be hard to identify Aiptasia and other polyps while they are still small but once they are fully formed it gets a lot easier. It can however sometimes still be a challenge.
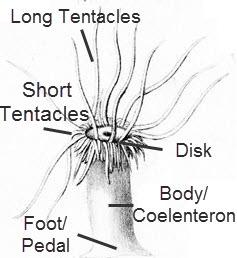
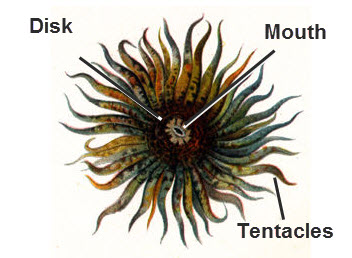 Aiptasia species looks like small palm trees with a disk of tentacles at the top. The disc contains both long and short tentacles attached at the edges of the disc. In the center of the disk is the mouth. It looks like an elongated slit. The tentacles are usually slender and have very pointed tips. If the tentacles are more chubby with bulbous tips you are most likely looking at the similar but very different Majano pest anemone. The “stalk” or the coelenteron (polyp body) as it is more correctly called of the Aiptasia can grow up to 5 cm / 2 inches long. The disk at the top can grow to be 2 cm / 3/4 inch wide.
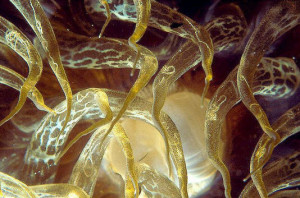
The coloration in the Aiptasia is caused by the dinoflagellate alga living in it. The color of the Aiptasia will hence vary with the lighting conditions under which it grows. In a well lit area Aiptasia will usually be dark to greenish brown. The tone of the Aiptasia will grow lighter the less light that is provided. This can give them a tan or even almost transparent look in low light conditions. It is common that the body of the Aiptasia features lightly marked parallel lines. These lines are however not always present. It is also not uncommon that white or light green flecks are present near the tentacles. Juveniles specimens can sometimes be entirely cover in flecks.
Aiptasia Species
Aiptasia mutabilis – Picture also used in article header.
© Alfiero Brisotto cc2.0
The following 16 species of Aiptasia is currently accepted:
- Aiptasia californica (Carlgren, 1952)
- Aiptasia carnea (Andrès, 1881)
- Aiptasia diaphana (Rapp, 1829)
- Aiptasia erythrochila (Fischer, 1874)
- Aiptasia insignis (Carlgren, 1941)
- Aiptasia inula (Duchassaing & Michelotti, 1864)
- Aiptasia leiodactyla (Pax, 1910)
- Aiptasia mimosa (Duchassaing & Michelotti, 1864)
- Aiptasia minuta (Verrill, 1866)
- Aiptasia mutabilis (Gravenhorst, 1831)
- Aiptasia pallida (Agassiz in Verrill, 1864)
- Aiptasia parva (Carlgren, 1938)
- Aiptasia prima (Stephenson, 1918)
- Aiptasia pulchella (Carlgren, 1943)
- Aiptasia saxicola (Andrès, 1881)
- Aiptasia tagetes (Duchassaing & Michelotti, 1864)
Aiptasia Care
There are a number of reason to actively keep and care for Aiptasia. The most common reason is likely as food if you are breeding Berghia nudibranches. Berghia only eat Aiptasia and is commonly sold to control Aiptasia
If you for some reason want to actively keep and care for Aiptasia you will find it to a be a very easy and hardy anemone. That is the reason they are considered a pest. It will not require any special care to grow as long as you keep decent water quality. I do not recommend keeping any other small fish or invertebrate in aquarium where you plan to grow Aiptasia. There is always a risk that they will get killed.
Acquiring Aiptasia can sometimes be hard since no one want to have it in their aquarium. It should however usually not be to hard to get some from an infested aquarist or aquarium store. Worst case scenario you might be able to get some from one of the many Berghia sea slug breeders that sell their slugs online.
Avoid keeping species that are known to eat Aiptasia such as peppermint shrimp and butterfly fish if you want to keep Aiptasia in your aquarium.
Aiptasia Reproduction
Aiptasia can reproduce both sexually and asexually.
- Asexual reproduction
Asexual takes place through pedal laceration. This happens when a small group of cells are somehow separated from the pedal disk of the Aiptasia. These small groups of cells grows into buds. These buds will then develop mouths and tentacles of their own. A miniature Aiptasia is normally formed within a week or two from the cells being separated from the parent polyp. This polyps can release their grip on the surface and float with the waters current to colonize a new spot. Colonies of Aiptasia form and grow primarily through asexual reproduction. Sexual reproduction play a larger role in spreading them to new locations. Aiptasia can as earlier mentioned regenerate an entire new anemone from a single cell. This is why they are so hard to eradicate and why methods that only destroys the polyp without killing all the cells such as manual Aiptasia removal are so contra productive.A surprising ability in at least some Aiptasia species (A. diaphana) is that pedal laceration can produce both male and female polyps. In other words, even though the new polyps created through asexual reproduction are clones of the original poly they can still developed into different sexes. Clones can reproduce with each other through sexual reproduction. Some clones have even been shown to develop into hermaphroditic polyps. - Sexual ReproductionThe Sexual reproduction in Aiptasia works different in different species. Some species such as the common Aiptasia pallida and Aiptasia pulchella have external fertilization. Other species supposedly have internal fertilization that takes places within the Aiptasia.Lets start by having a look on sexual reproduction in Aiptasia species such as Aiptasia pallida and Aiptasia pulchella. The reproduction in these species are well researched. The Aiptasia belong to one of two genders. The two genders release their gametes into the water where the fertilization occurs. The resulting zygote turns into free swimming planula larva. These free swimming planula larva flows with current for a while before they settle down on a hard substrate. Once they have attached themselves they grow and metamorph into tiny polyps. The symbiotic dinoflagellate alga found in Aiptasia is absorbed into the tiny polyp from the water.Lets now look on internal fertilization in Aiptasia. This is believed to occur in some species but I have been unable to find an concrete scientific evidence or documentation to verify this. It is however know that some species of anemones are capable of internal fertilization so it would not be surprising if the reproductively very versatile Aiptasia genus contained species that is capable of internal fertilization. Internal fertilization takes places when the male Aiptasia release their sinking gametes into the water. They settle down and fertilizes the gamets within the coelenteron of a female Aiptasia. Planula Larva are then developed and grows within the Aiptisia. The Planula Larva are released when the conditions are right or if the mother polyp is attacked. They then go on to colonize new locations on the reef.
Aiptasia will reproduce more asexually during poor conditions such as when under attack from predators, during poor lighting, in low oxygen situations etc. During good conditions they reproduce more sexually. In the wild there is also evidence that the season affects the preferred reproduction method in Aiptasia. Many chemical Aiptasia remedies also causes increased asexual reproduction.
References
Schlesinger A, Kramarsky-Winter E, Rosenfeld H, Armoza-Zvoloni R, Loya Y (2010) Sexual Plasticity and Self-Fertilization in the Sea Anemone Aiptasia diaphana. PLoS ONE 5(7): e11874. doi:10.1371/journal.pone.0011874
http://lanwebs.lander.edu/faculty/rsfox/invertebrates/aiptasia.html
Flower Pot Coral
Scientific Name: Goniopora Sp.
Common Name: Flower Pot Coral, Goniopora, Sunflower Coral
Type of Coral: LPS (Large Polyp Stony Coral)
Lighting: Moderate
Flow: Moderate
Care Level: Moderate to Moderate / Difficult
Temperament: Peaceful to Semi-aggressive
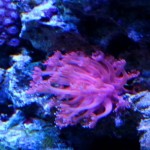
Appearance
As the name suggests, the flower pot coral can look like a bouquet of flowers when all of it’s polyps are open and extended. The base of the colony will be rounded and the polyps will extend far beyond the base. The polyps will also have small tentacles on the ends giving the coral its flower like appearance. They can also have a verity of colors from greens, reds, and even yellows as examples.


Water Conditions
The below link highlights typical water conditions flower pot corals, just as with most LPS, will require. As this is a moderately difficult coral to keep, you should ensure your dKH, Cal and Mag levels are maintained at all times with minimal nitrate and phosphate levels. As this coral also has a calcified skeleton (or base), it will consume at least some calcium from your water. In set-ups with a good amount of LPS corals, it is not uncommon to have to dose dKH and Cal in order to keep the water parameters in line. With only a few LPS corals, a good water change schedule may be enough to maintain your parameters as well as replenishing trace elements. Some studies have also suggested the flower pot coral may to better (long term) with slightly elevated nitrate levels between 1 and 5 ppm.
https://www.reefaquarium.com/2013/the-basics-of-marine-aquarium-water-parameters/
General Information
Flower pot corals should be added to mature aquariums. Provided all their requirements are met, they colony can grow to about 7 to 9 inches. This is a not a very aggressive LPS coral but it still can sting other corals. A distance of 3 or 4 inches from other corals would be a good idea.
Clownfish have also been known to host in flower pot corals in aquariums that do not have anemones. Although this will not harm the clownfish, this can sometimes stress the coral to the point where it could become damaged and prone to infections.
These corals can also benefit from the occasional feeding of micro-planton. Although the below link shows how to spot feed clams, the same process can be applied to spot feeding flower pot corals.
https://www.reefaquarium.com/2012/spot-feeding-marine-clams/
As with all corals, the exterior slime coating can be a skin irritant or even highly toxic to humans so please, handle all corals with care. I would recommend wearing rubber gloves whenever you handle corals
Fragging
Flower pot corals can be fragged.

Duncan Corals
Scientific Name: Duncanopsammia Axifuga
Common Name: Duncan Coral, Whisker Coral, Daisy Coral,
Type of Coral: LPS (Large Polyp Stony Coral)
Lighting: Moderate
Flow: Moderate
Care Level: Moderate
Temperament: Peaceful to Semi-Aggressive
Appearance
Duncan corals will have a base that consists of an calcified skeleton structure covered in a green or pink colored thin layer of flesh. At the end of this structure will be individual fleshy heads with long polyps extending around the edges and a mouth in the center of the head. The heads will be a similar color to the base.

Water Conditions
The below link highlights typical water conditions Duncan corals, as with most LPS, will require. As this is a moderately difficult coral to keep, you should ensure your dKH, Cal and Mag levels are maintained at all times with minimal nitrate and phosphate levels. As this coral also has a calcified skeleton, it will consume calcium from your water. In set-ups with a good amount of LPS corals, it is not uncommon to have to dose dKH and Cal in order to keep the water parameters in line. With only a few LPS corals, a good water change schedule may be enough to maintain your parameters. In addition to the article in the below link, this coral can also benefit from maintaining strontium levels if you do not have a good water change routine using a very good quality salt.
https://www.reefaquarium.com/2013/the-basics-of-marine-aquarium-water-parameters/
General Information
Duncan corals, as with all other LPS corals, should be added to mature aquariums. Provided all their requirements are met, they can grow to a very large colony within a few short years. Unless you are planning to move or frag your duncan coral, you should give it as much as 20 inches of space in your tank.
The Duncan coral will release sweeper / feeder tentacles from its heads to collect food. This will mostly happen when the tanks lights are off. These tentacles can also sting and damage or kill other corals within reach, which is how the duncan coral will defend itself. What makes the duncan coral more peaceful than most LPS coral is that its sweeper tentacles are much shorter in comparison only measuring a few inches in length.
Although the duncan coral will get what it needs from the lighting in your tank, it can also benefit from micro plankton or manual feeding of small pcs of meaty foods placed directly on the mouths at the center of each head. Although manual feedings are not required, it will help to accelerate growth.
As with all corals, the exterior slime coating can be a skin irritant or even highly toxic to humans so please, handle all corals with care. I would recommend wearing rubber gloves whenever you handle corals
Fragging
Duncan corals can be fragged with very good success.
Ricordea Mushroom Corals
Scientific Name: Ricordea Florida
Common Name: Ricordea Mushroom, Anemone Mushroom
Type of Coral: Softie
Lighting: Moderate and Moderate to Low
Flow: Moderate
Care Level: Easy
Temperament: Semi-aggressive
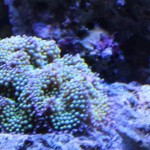
Appearance
Ricordeas can also be found in a wide verity of colors and sizes making then a very great choice to add some color to any reef aquarium. It is also common to find some that have three different colors on them, one color around the edge of the cap, one color on the cap itself, and a third color in the center of the ricordeas. The surface of their cap looks like it is made up of small little balls giving them a very interesting structure. They also commonly range in size from ½ inch to 3 inches, but there are a few types of Ricordeas that do get larger. The below pictures are just a few examples.

Water Conditions
The below link highlights typical water conditions Ricordeas will require. I have had the best luck with ricordeas when kept in water with 1 to 2 ppm of nitrate when lighting and flow requirements were meat and all other water parameters in line as described in the below link.
https://www.reefaquarium.com/2013/the-basics-of-marine-aquarium-water-parameters/
General Information
As Ricordeas do not have a calcified skeleton structure, they can be more tolerant of swings in the alkalinity, calcium, and magnesium when compared to other corals. However, they will not be very tolerance to swings in pH, Temp, or salinity which is no different than any other coral or fish. They are a very hardly coral making them a good choice for people new to the hobby. As with most other corals, Ricordeas have natural defense mechanisms to protect themselves. They have a chemical defense system based on stinging tentacle that will extend out from its cap. This can be harmfully to certain types of other soft corals and SPS corals. This makes it important to ensure you leave about 2 inches of space between your mushroom corals and other types of corals you may have in your tank. Ricordeas will do best when placed on your live rock in your tank.
As with all corals, the exterior slime coating can be a skin irritant or even highly toxic to humans so please, handle all corals with care. I would recommend wearing rubber glove whenever you handle corals
Fragging
Ricordeas can be easily fragged with very high success

Long Polyp Leather Coral
Scientific Name: Sarcophyton SP
Common Name: Long Polyp Leather, Long Polyp Toadstool Leather
Type of Coral: Softie
Lighting: Moderate and Moderate to Low
Flow: Moderate and moderate to high
Care Level: Easy
Temperament: Semi-aggressive
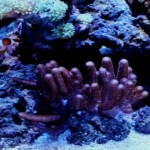
Appearance
Generally speaking, leather corals are a soft skinned coral with visible polyps all over their skin. A leather coral can look one way in a aquarium and then (over time) look very different when placed in another tank based only on the water parameters, lighting and flow.
There will typically be a short light brown colored base with a head structure on top that will make it look a lot like a mushroom. It will have longer polyps on the head that are a little lighter color than the base and that can range in length of up to a inch. The polyps can be gold to light brown in color. The head of this coral can get as big as 5 inches so you should leave at least 8 to 9 inches of space all around this coral to help prevent any defensive response from this coral


Water Conditions
The below link highlights typical water conditions this leather coral will require. I have had the best luck when they were kept in water with 1 to 2 ppm of nitrate when lighting and flow requirements were met and all other water parameters in line as described in the below link.
https://www.reefaquarium.com/2013/the-basics-of-marine-aquarium-water-parameters/
General Information
They do not have a calcified skeleton structure making them a little more tolerant of some water parameters like calcium. However, they will not be very tolerance to swings in pH, Temp, or salinity which is no different than any other coral or fish. They are a very hardly coral making them a good choice for people new to the hobby. Most leathers have a very effective defensive ability. Leathers commonly have the ability to sting other corals and some fish along with emitting chemicals to ward off other corals from entering their space. For this reason it is very important to understand how big your leather coral can get and plan for enough space between your leather coral and other corals. Just leaving a few inches may not always be enough as some leathers can get surprisingly large. It would also be a good idea to have some carbon in your set-up in case your leather will start to emit defensive chemicals. This is one coral that will be the least likely to be picked on by most fish in the hobby.
As with all corals, the exterior slime coating can be a skin irritant or even highly toxic to humans so please, handle all corals with care. I would recommend wearing rubber glove whenever you handle corals
Fragging
Leathers can be easily fragged with very high success
Finger Leather
Scientific Name: Sinularia SP
Common Name: Finger Leather.
Type of Coral: Softie
Lighting: Moderate and Moderate to Low
Flow: Moderate and moderate to high
Care Level: Easy
Temperament: Semi-aggressive
Appearance
Generally speaking, leather corals are a soft skinned coral with visible polyps all over their skin. A leather coral can look one way in a aquarium and then (over time) look very different when placed in another tank based only on the water parameters, lighting and flow.
The polyps will have a little different color than the base. These leathers can get up to 8 inches in height and around 12 inch wide along the base. This coral will need anywhere from 14 to 15 inches of space in a aquarium. Due to their size and coloring, many hobbyists have used them as a center pc coral. They can come in a variety of different colors.

Water Conditions
The below link highlights typical water conditions this leather coral will require. I have had the best luck when they were kept in water with 1 to 2 ppm of nitrate when lighting and flow requirements were met and all other water parameters in line as described in the below link.
https://www.reefaquarium.com/2013/the-basics-of-marine-aquarium-water-parameters/
General Information
They do not have a calcified skeleton structure making them a little more tolerant of some water parameters like calcium. However, they will not be very tolerance to swings in pH, Temp, or salinity which is no different than any other coral or fish. They are a very hardly coral making them a good choice for people new to the hobby. Most leathers have some very effective defensive abilities. Leathers commonly have the ability to sting other corals and some fish along with emitting chemicals to ward off other corals from entering their space. For this reason it is very important to understand how big your leather coral can get and plan for enough space between your leather coral and other corals. Just leaving a few inches may not always be enough as some leathers can get surprisingly large. It would also be a good idea to have some carbon in your set-up in case your leather will start to emit defensive chemicals. This is one coral that will be the least likely to be picked on by most fish in the hobby.
As with all corals, the exterior slime coating can be a skin irritant or even highly toxic to humans so please, handle all corals with care. I would recommend wearing rubber glove whenever you handle corals
Fragging
This leathers can be easily fragged with very high success

Mushroom Corals
Scientific Name: Actinodiscus SP
Common Name: Mushroom Corals
Type of Coral: Softie
Lighting: Moderate and Moderate to Low
Flow: Moderate
Care Level: Easy
Temperament: Semi-aggressive
Appearance
Mushrooms can also be found in a wide verity of colors and sizes making then a very great choice to add some color to any reef aquarium. They also commonly range in size from ½ inch to 2 inches, but there are a few types of mushrooms that do get larger. The below pictures are just a few examples.


Water Conditions
The below link highlights typical water conditions mushrooms will require. I have had the best luck with mushrooms when kept in water with 1 to 2 ppm of nitrate when lighting and flow requirements were met and all other water parameters in line as described in the below link.
https://www.reefaquarium.com/2013/the-basics-of-marine-aquarium-water-parameters/
General Information
As mushroom do not have a calcified skeleton structure, they can be more tolerant of swings in the alkalinity, calcium, and magnesium when compared to other corals. However, they will not be very tolerance to swings in pH, Temp, or salinity which is no different than any other coral or fish. They are a very hardly coral making them a good choice for people new to the hobby. As with most other corals, mushrooms have natural defense mechanisms to protect themselves. They have a chemical defense system based on stinging tentacle that will extend out from its cap. This can be harmfully to certain types of other soft corals and SPS corals. This makes it important to ensure you leave about 2 inches of space between your mushroom corals and other types of corals you may have in your tank. Mushroom will do best when placed on your live rock in your tank.
As with all corals, the exterior slime coating can be a skin irritant or even highly toxic to humans so please, handle all corals with care. I would recommend wearing rubber glove whenever you handle corals
Fragging
Mushrooms can be easily fragged with very high success