Author Archives: Cliff

Tip of the Week # 8, Stocking Tangs
The one aspect about stocking marine aquariums that I have found the most conflicting information on is what is a proper stocking plan when keeping tangs. A part of the problem is the amount of variation between maximum sizes, growth rates, and the temperament / personality of the fish. I have personally seen yellow tangs reaching a maximum size 10 inches and other reaching a maximum size of about 14 inches, both being kept in set-up that would allow for more growth.
So what is the right answer ?
- Do your homework, get as much first hand information from trustworthy people as possible.
- If you are new to marine aquariums, error on the side of caution and get a aquarium that is a little larger than what you could stock your tang in.
- Use extreme caution when keeping multiple tangs in one aquarium in numbers less than 5.
- Always watch carefully for signs that your current stocking is not working out in the best interests of the fish.
The below links will provide you with some further information to help you understand this better
https://www.reefaquarium.com/2013/responsible-fish-keeping/
http://coralmagazine-us.com/content/arrested-tang-police-i-refuse-confess
http://microcosmaqx.typepad.com/jay_hemdal/2009/01/beware-the-tang-police.html
http://www.tfhmagazine.com/saltwater-reef/feature-articles/putting-fish-back-into-the-reef-tank.htm
Tip of the Week # 7 – Skimmer Capasity
Manufacture ratings should always be considered as guidelines and never hard fast rules. In my opinion, almost all of these capacities are over rated. The reason for my opinion is that manufactures typically complete their product testing with the gate valve and air valve(s) wide open to calculate the maximum flow rate and maximum air intake using these measurements to calculate the maximum rated capacity for the skimmer. As we all know, the gate valve and air valve(s) will need to be adjusted in order for the skimmer to work properly which will also lower both the flow rate and air intake of the skimmer from the manufacture’s measurements. This is why many hobbyist prefer to use skimmers that have a much higher rated maximum capacity than their aquarium.
The below link can help you determine how to pick out a skimmer for your set-up
https://www.reefaquarium.com/2013/selecting-a-new-skimmer/
And the below will offer you some other ways to evaluate potential skimmers
http://www.advancedaquarist.com/2010/1/aafeature
And some interesting skimmer information
http://reefbuilders.com/2012/12/20/protein-skimmers-function/
http://reefbuilders.com/?s=skimmers
Tip of the Week # 6 – Carbon Dosing
If you are planning to use carbon dosing to reduce high levels of nitrates and/or phosphates, please keep in mind you need to start off slowly and at a very low level. Making quick and drastic changes to your nitrate levels through all/any forms of carbon dosing will cause your water parameters to become at least somewhat unstable. Take it very slow to begin with allowing your system to slowly adjust over time. You have to always keep in mind, only bad things will happen fast in this hobby.
More information about carbon dosing can be found in the below article:
https://www.reefaquarium.com/2012/carbon-dosing-in-laymans-terms/
And a few other articles about carbon dosing
Tip of the Week # 5 – Fish Compatibility
Sometimes you can thoroughly complete your research to ensure the best possibly compatibility between all of your fish, but you sometimes will just end up with all kinds of problems. The reason for this is that fish can also have their very own unique and individual personalities. And just like people, you can find miserable , grumpy, and mean fish that are completely different the average fish of the exact same species. Although I would think this is a very small percentage, it is still a risk.
This is why I always recommend that you keep a very close eye on your aquarium every time you add a new fish to the set-up. Even when you quarantine a new fish for 4 or 5 weeks, you may still not know with 100% certainty how well this will work out until you add them.
The below link and also offer a few guidelines to help you think through determining appropriate stocking for your aquarium
https://www.reefaquarium.com/2013/responsible-fish-keeping/
The below link can also offer you some good ideas about stocking butterflys in reef set-ups
http://reefbuilders.com/2013/10/29/keeping-butterflyfish-reefs-avoid/
Two Little Fishies 150 PhosBan Reactor Product Review
This is among the more popular fluidized reactors in use today due to its smaller size, affordable pricing, and flexibility of use. The below information was taken directly from the manufacture’s website
http://www.twolittlefishies.com/documents/1202405781.pdf
PhosBan Reactor 150™
The PhosBan Reactor 150 is designed with the upflow principle to achieve the most efficient use of PhosBan® or other chemical filter media. By pushing water from the bottom upward through a dispersion plate, it forces an even distribution of water through the media, and prevents channeling. It can be mounted hanging on the back of the aquarium or below the aquarium. Hose barb connections are for 1/2 inch i.d. tubing. Includes 1/2 inch barbed ball valve for flow control, and hose clamps. Use with any pump having a capacity between 100 and 250 gph, but regulate the flow rate to the recommended 20 to 30 gallons per hour with the included ball valve.
I have been using one for a few months now and have found it to be very good value for the money.I am currently using mine for biopellets on a sumped 120 gallon FOWLR aquarium. I have friends and fellow hobbyists who swear by this reactor and have been using it for a few years with phosphate removing media.I really like using this reactor in a sump due to the small footprint it takes up and the fact I will not have to worry about it leaking when used in a sump. The below is a list of pros and cons that I have found using this reactor.
Pros:
-Small size can be used in all most any type of sumped set-up with minimal room lost.
-Can easily fit under aquarium stand if not used in a sump
-Can be used in a hang on back style set-up
-Comes with a built in ball valve
-Very reasonably priced
Cons:
-The supplied connectors often leak a very small amount.If used outside a sump or aquarium, you will need to add better clamps to connect the fittings and hose together in order to prevent any leaks
-You will still need to purchase a pump to use it in some configurations.
-It is not convenient to remove and take apart for routine cleaning or replacing media.
-Some types of media can clump up or just not move around the outside edges along the bottom of the reactor.However, this is a common situation to find in all reactors with a similar design.
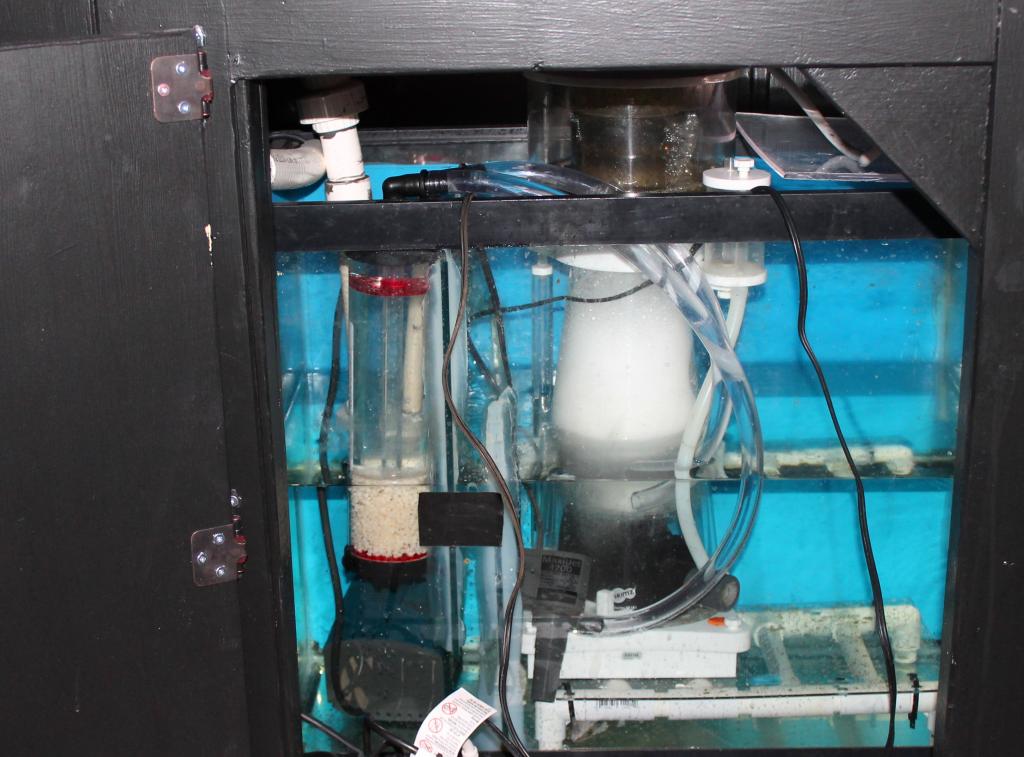
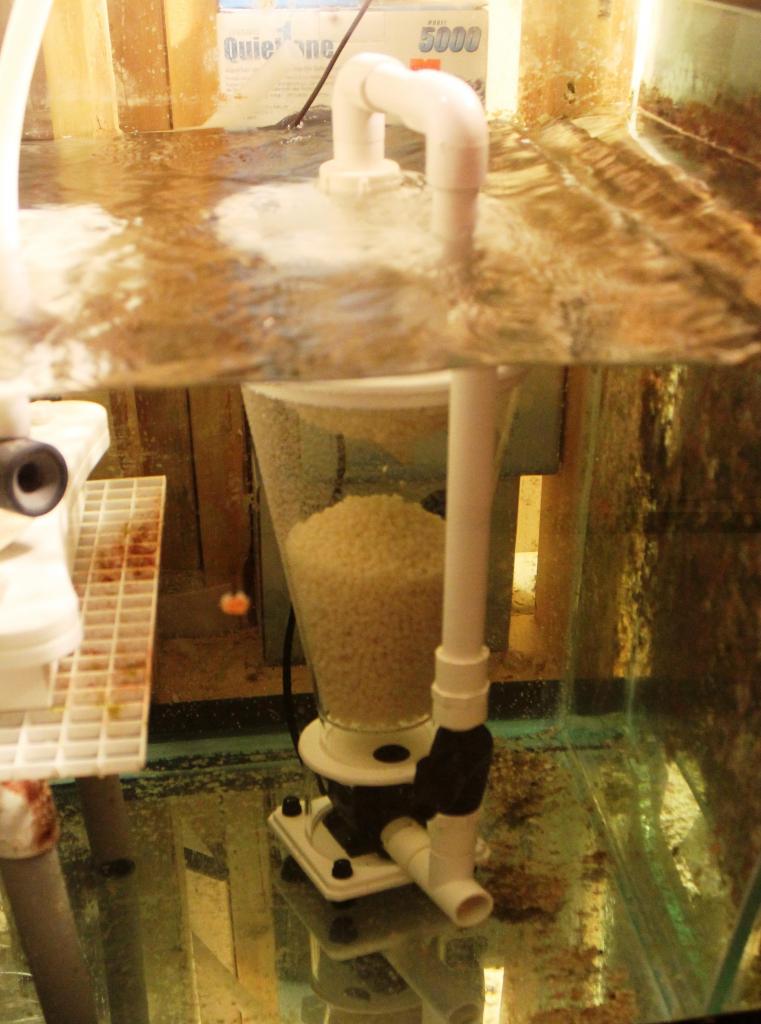
One quick tip on using this in a sump, if you keep the portion of the reactor with the media in it below the water line in the sump, you will need lover flow rates through the media and the reactor will work better. I took a picture and inserted it below to help explain what I am talking about.
Overall I am happy with the performance of this reactor and would recommend it to anyone who has a set-up with limited space for a reactor.
Tip of the Week # 4 – Salinity Levels
Your salinity level is among one of the more important parameters in a marine aquarium. Maintaining a proper salinity level will help you establish a proper pH as well as making your alkalinity and calcium levels a lot easier to maintain stable.
So what is the proper salinity level ? Many people have many different opinions about this ranging from 1.020 to 1.029 and they will also have a thought process in support of their options mostly around the type of setup they have. As the more popular fish and corals that we keep in the hobby come from in or near the ocean’s coral reefs with a salinity of around 1.026, I prefer to keep the salinity levels my FOWLR and Reef aquariums at the same level as these areas of the ocean, 1.026 (35ppt). However, there are some exceptions to that. The Red Sea for example will have a salinity level of around 1.028 to 1.030 depending on the exact location making it better to have a slightly higher salinity level if keeping fish or corals from the Red Sea.
You really do need to understand the water parameters in the area of the ocean that your fish and corals come from before you develop your own approach to maintaining your salinity.
The below link is to a very handy article that contains instruction for very different types of marine test kits
http://successfulreefkeeping.com/resource/aquarium-test-kit-instructions/
Tip of the Week # 3 – Waterchanges
Don’t underestimate the importance of waterchanges!
In may low demanding and more basic set-ups, weekly water changes in the range of 5% to 20% would be all that you would need to replace the consumed elements from your water as well as helping to control excesses nutrient build-up. Many people do not realize that water changes when cycling your tank can also be very important and beneficial with harming or prolonging most commonly used cycling processes.
Waterchanges when cycling a marine aquarium with at least some live rock my actually help you out down the road. This is very different from a typical fishless cycle in a freshwater aquarium. Within the nitrogen cycle that develops in your marine aquarium, you will develop bacteria that eats the proteins and turns them into ammonia. This type of bacteria will reproduce a lot faster than the ammonia eating bacteria, so the ammonia produced can actually grow to toxic enough levels that will prolong the cycle. Typically this point occurs somewhere around 1 to 2 ppm of ammonia. This is why you have to do water changes if the ammonia reaches levels of 1 to 2 ppm or higher. The water change will help reduce the ammonia and other decaying particles from the tank helping the cycle complete faster and the water parameters become balanced quicker. Although there is some beneficial bacteria free floating in the water, it will be in such small amounts that water changes will not remove enough of them to be impactful in any way. This is why water changes when cycling with at least some live rock will help the cycle move along faster, not slow it down one bit. This will also help to limit the potential for higher levels of nitrates before the nitrate eating bacteria has a change to develop which will reduce the risk of nitrate build up within your rock.
And the below are some more interesting article that I found and thought I would share

CAD Lights Biopellet Reactor Equipement Review
For the past few years I have been using biopellets in a traditional or common media reactor. While this traditional design has been a highly effective design for media such as phosphate removers or carbon, I have found it not to work that well when with the biopellets on the market today. In my experience, it has been challenging to maintain the biopellets properly suspended in the reactor with the correct amount of flow. Clumping and uneven biopellet movement due to uneven water flow through the reactor has always remained a challenge.
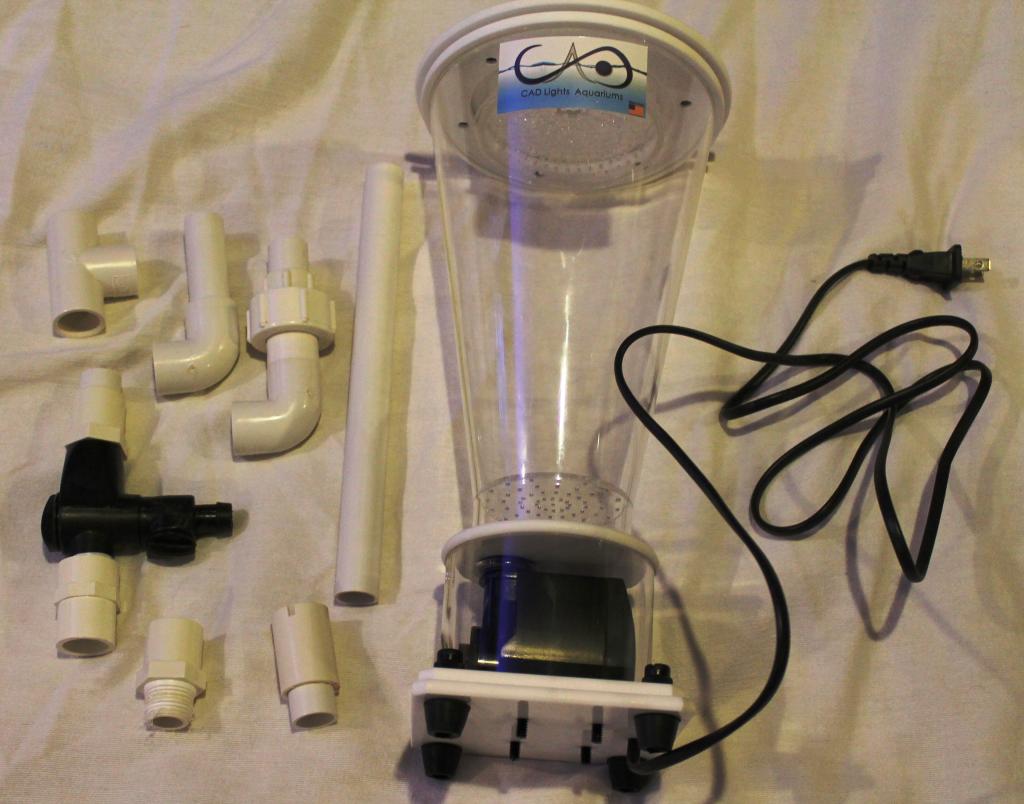
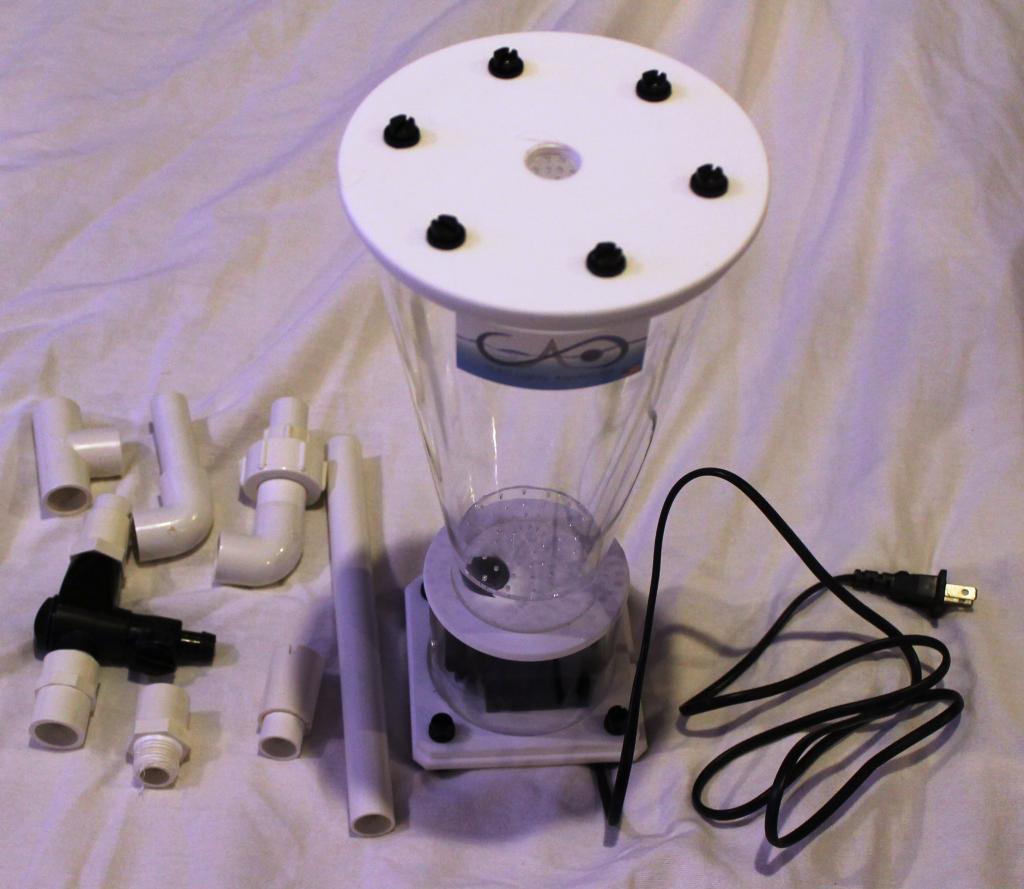
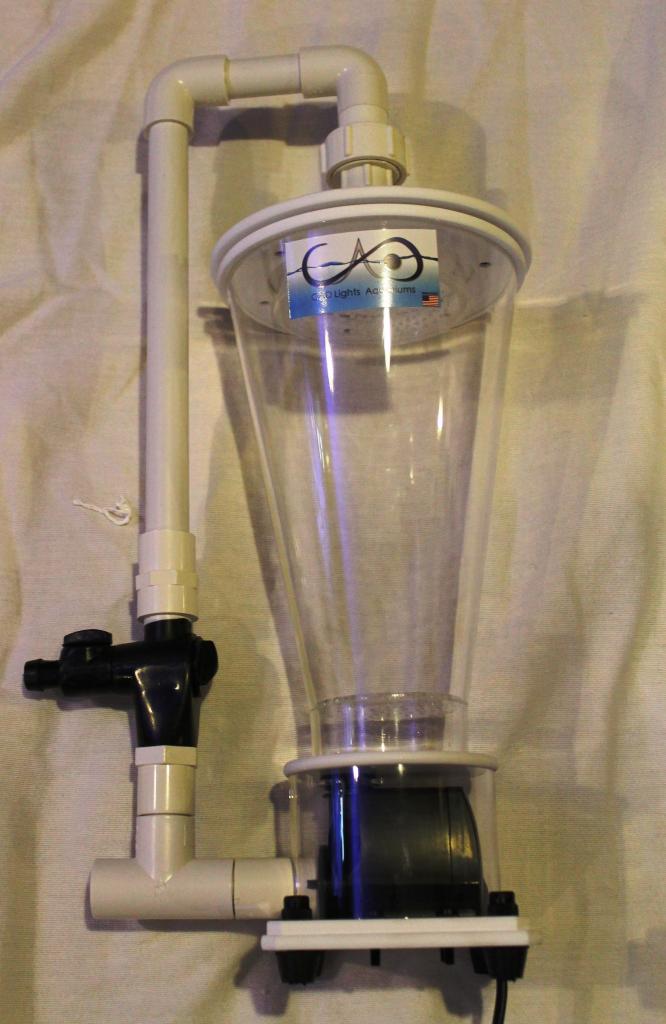
I had been looking for an alternative to the common media reactors. In early 2012, Cad Lights Aquariums launch the Conic Media Reactor (CAD Lights Biopellet Reactor), which is a new reactor designed specifically for use with biopellets. The model I purchased is the BR-1
The below information is taken directly from the manufacture’s website
http://www.cadlights.com/index.php?main_page=product_info&cPath=51&products_id=213
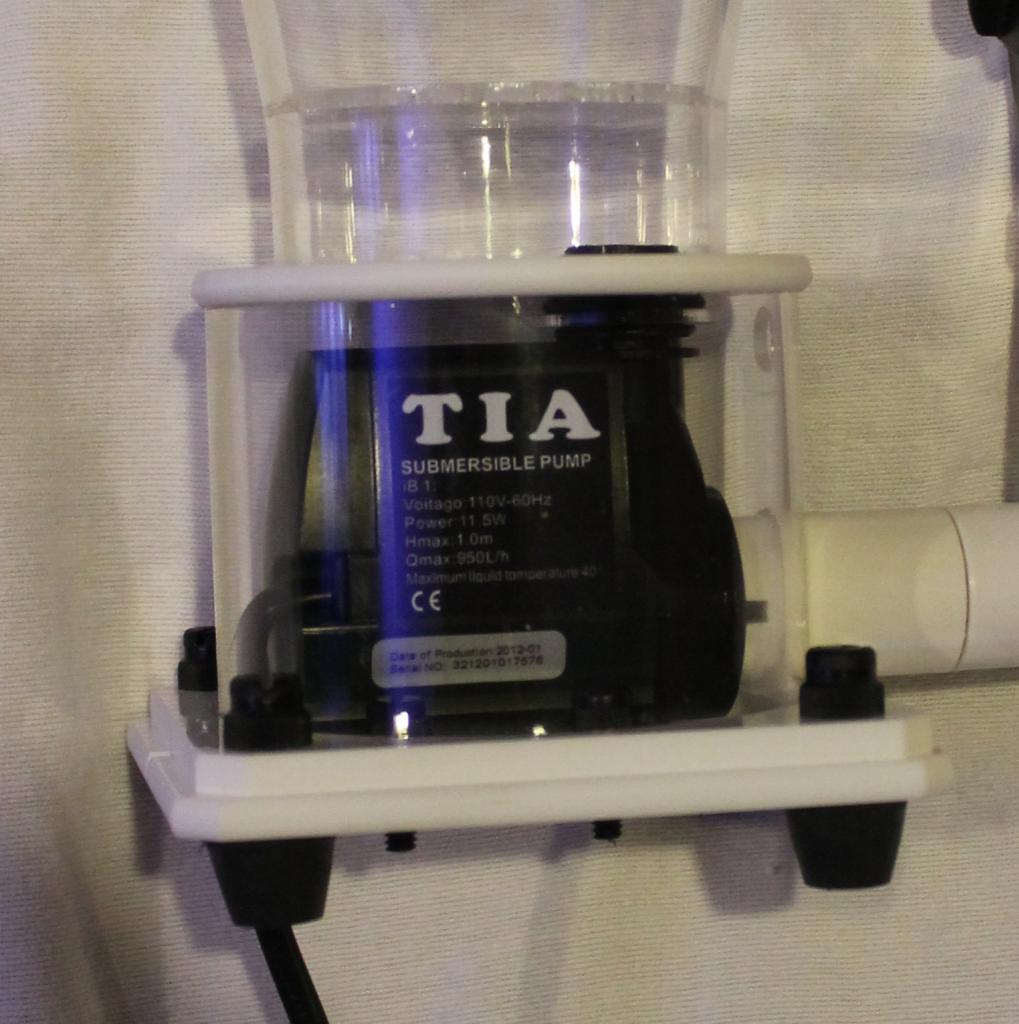
“Specifications
* NEW 3-way recirculating valve gives you the control of the Bio-reactor at your hands.
* Total space useage: 6″ x 6″ x 12″ (16″ high with plumbing)
* Capacity of 50G up to 350G
* Can hold up to 750ML of Bio-pellets.
* Compatibility: works best with Tapered edge or other non-perfectly round bio-pellets.
* Built in pump
* 11.5W of energy use.
* Standard 1/2″ SCH40 PVC can easily be extended to reach into other chambers for installation.
* Total silence.”
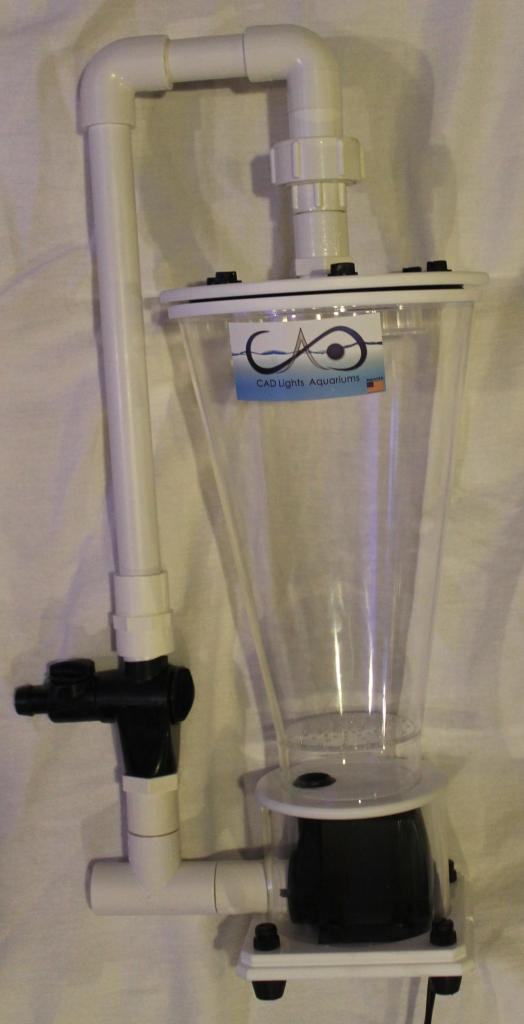
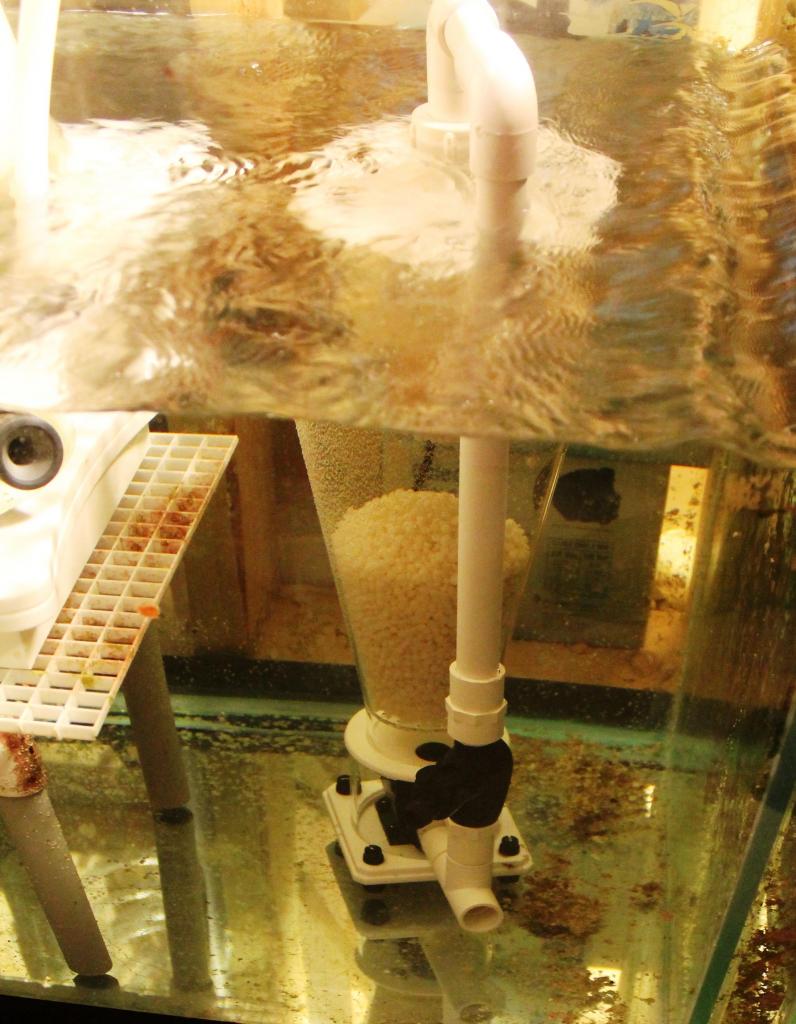
Base on my own experience, this design has two main features that make it different
1 The media chamber is an inverted triangle shape.
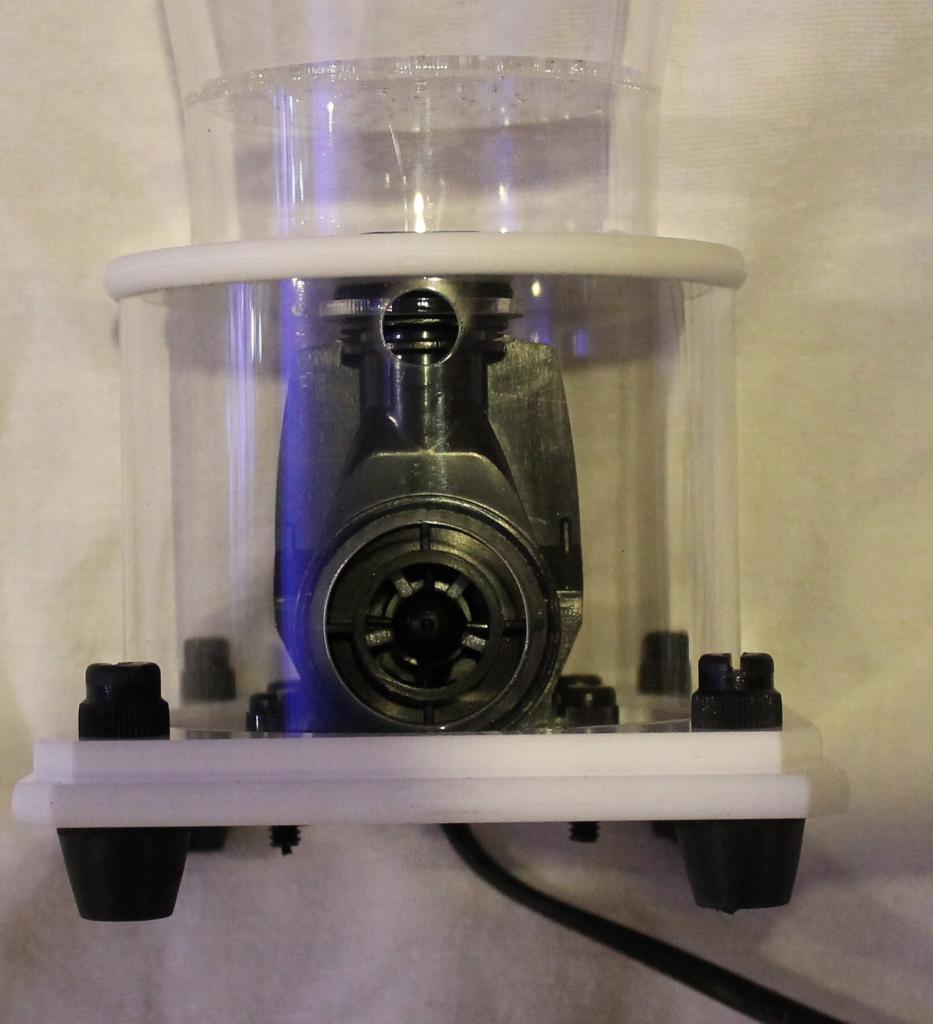
2 The pump is placed inside the reactor beneath the reactor chamber.
These two new features help to focus the right amount of flow even through the pellets keeping all pellets consistently moving within the reactor chamber while keeping the foot print of the reactor smaller. Based on a few weeks of use, I am extremely happy with the performance of this reactor. In my opinion, this design makes the Cad Lights Conic Media Reactor among the better reactors on the market right now.
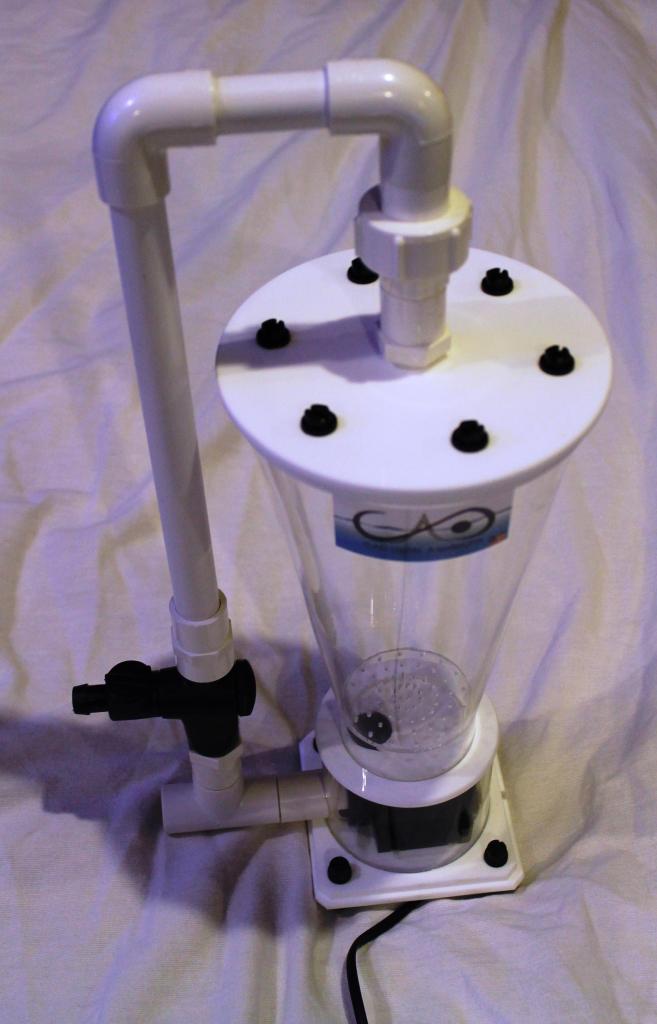
I was also extremely impresses with the manufacture. The reactor cam very well packaged and they even went the extra mile to pre-wrap the threaded connection on the one fitting you have to screw onto the top of the with a good quality thread tap. This shows the company cares about quality.
The only drawback that I can see with this reactor design is that it does require more height clearance than a traditional media reactor which could be a limiting factor when using in an aquarium stand on aquariums smaller than 150 gallons.
Although I feel this reactor doesn’t work as well as the manufacture claims, it still is a very good quality reactor and I would recommended it to anyone who has the required room in their sump for it.
How to Frag Leather Corals
A good friend and fellow hobbyist asked me for a frag from one of my corals that he has really liked for a while now. As I was getting the frag for him, I thought I would take the time to show how I prefer to frag leather corals.This is not the only way to frag a coral, but it is the way that I find the easiest for both me and the coral.
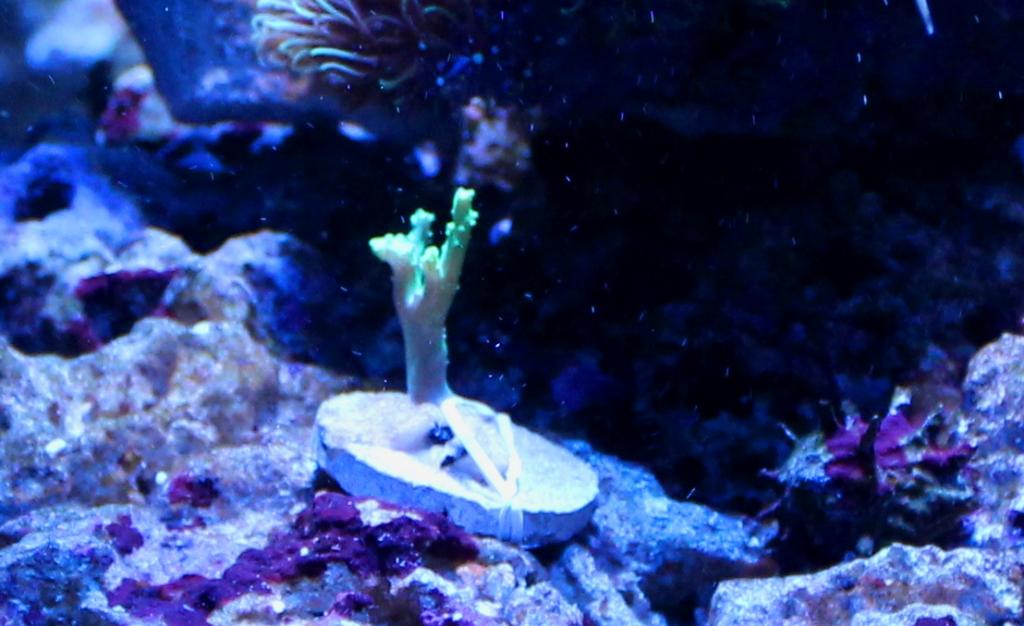
Step – 1 Plan the frag
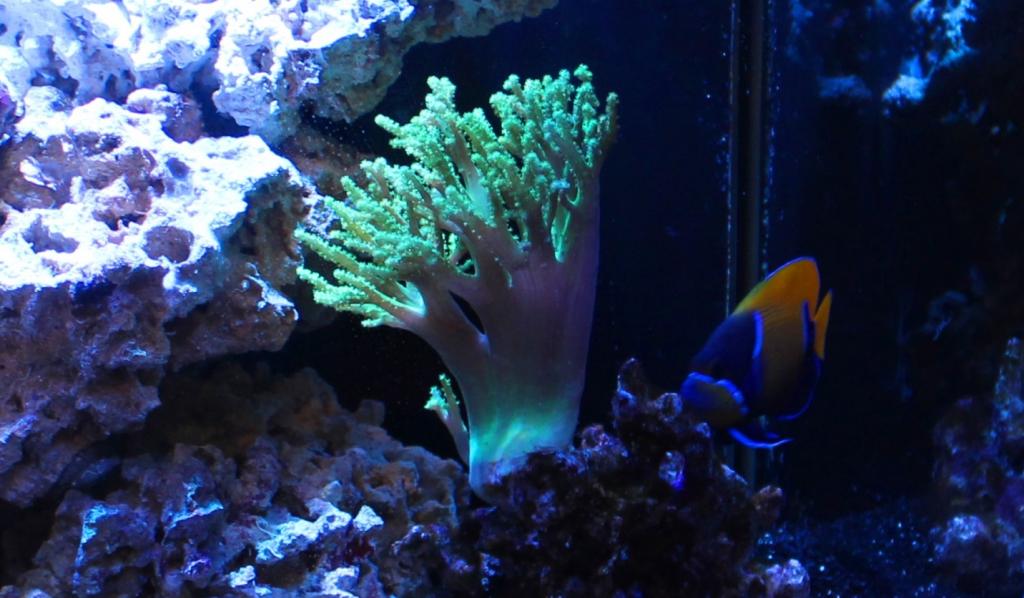
By this I mean you should decide what part of the leather you want to frag. In this instance, there is a small growth near the base of the blue mushrooms coral on the left hand side (as pictured below). I could have chosen almost any part of this leather to frag and it really would not have mattered too much, but that small growth just seamed it would be easier to frag.
Step Two – Remove and Frag the leather
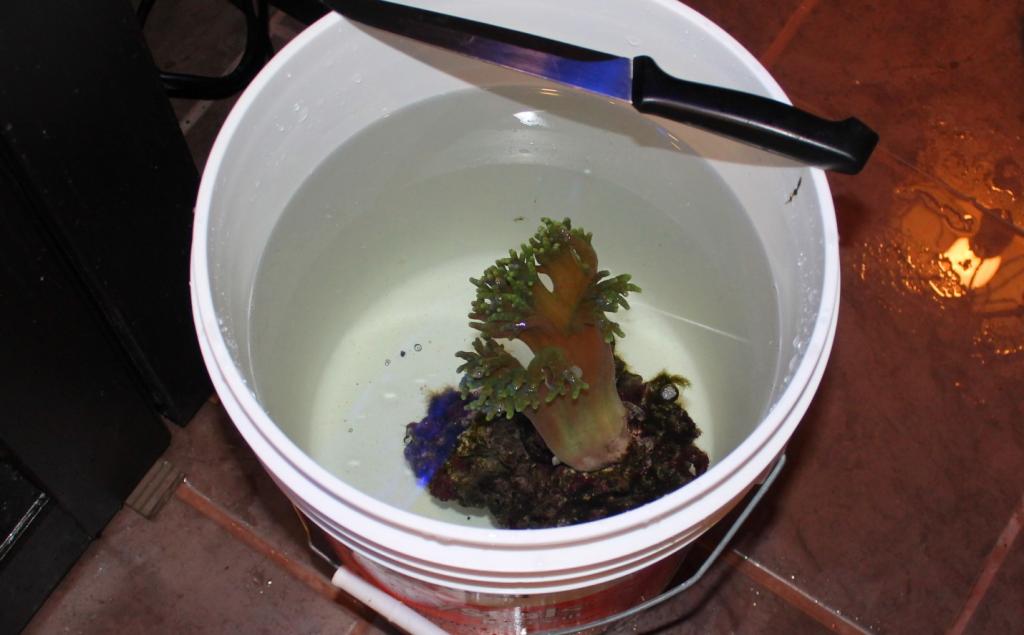
It is always best if you can remove the leather from the aquarium when you frag it. In this case I had removed the leather and the rock it was sitting on and placed it in a 5 gallon pale of tank water.There are two reasons for doing this. The first is that leathers can release toxins when being fragged, and the second is that you can add a coral treatment to the container to help the coral heal faster.Many others have successfully fragged leathers while still in the display tank.I have always been able to remove mine for fragging so I have always done that.
Step three – Frag it
This is simply cutting a part of the coral off from the rest of the coral. Make sure you use a very sharp razor or butcher’s knife and cut the peace off in one smooth and gentle motion.Remove the frag to a second container of water and leave the leather in the current container. Add a good quality coral treatment to both containers to help the corals heal the damaged areas. Once the main coral has had about 10 minutes in the coral treatment, you can replace it to your main display tank. I would also suggest having fresh carbon running on your set-up to remove any toxins the leather might release.
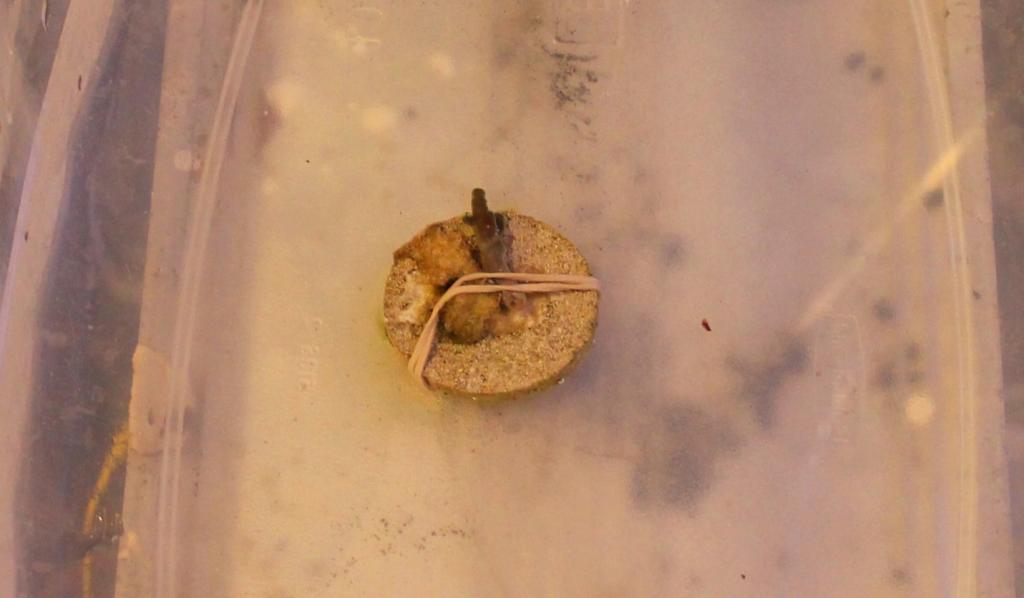
Step four – Attach the frag
In my experience, you have to let leathers naturally attach themselves to something.Every time I have tried an approach that involved glues or any other type of method, I found the leather will just produce extra slime coating and become detached within a day or two. I have the best success by using a rubber band to gently hold the frag to a frag plug or piece of rock. You want just enough pressure to hold the frag in place, any more and you could cause the frag to divide into two smaller pieces and both becoming detached.
You don’t have to worry about attaching the frag so it sits up-right as it will grow up-wards towards the light in no time at all.
Step 5 – Return the frag
I always like returning the frag to the display tank as soon as it had about 10 minutes in the other container with a coral treatment. I will place the frag in a lower area of the aquarium with low flow to help the leather attach to the frag plug. In my experience, it takes about two to three weeks for the frag to attach to the plug assuming it is not getting stressed by crabs (or other critters) and it’s lighting and water quality needs are being met.
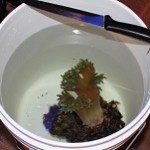
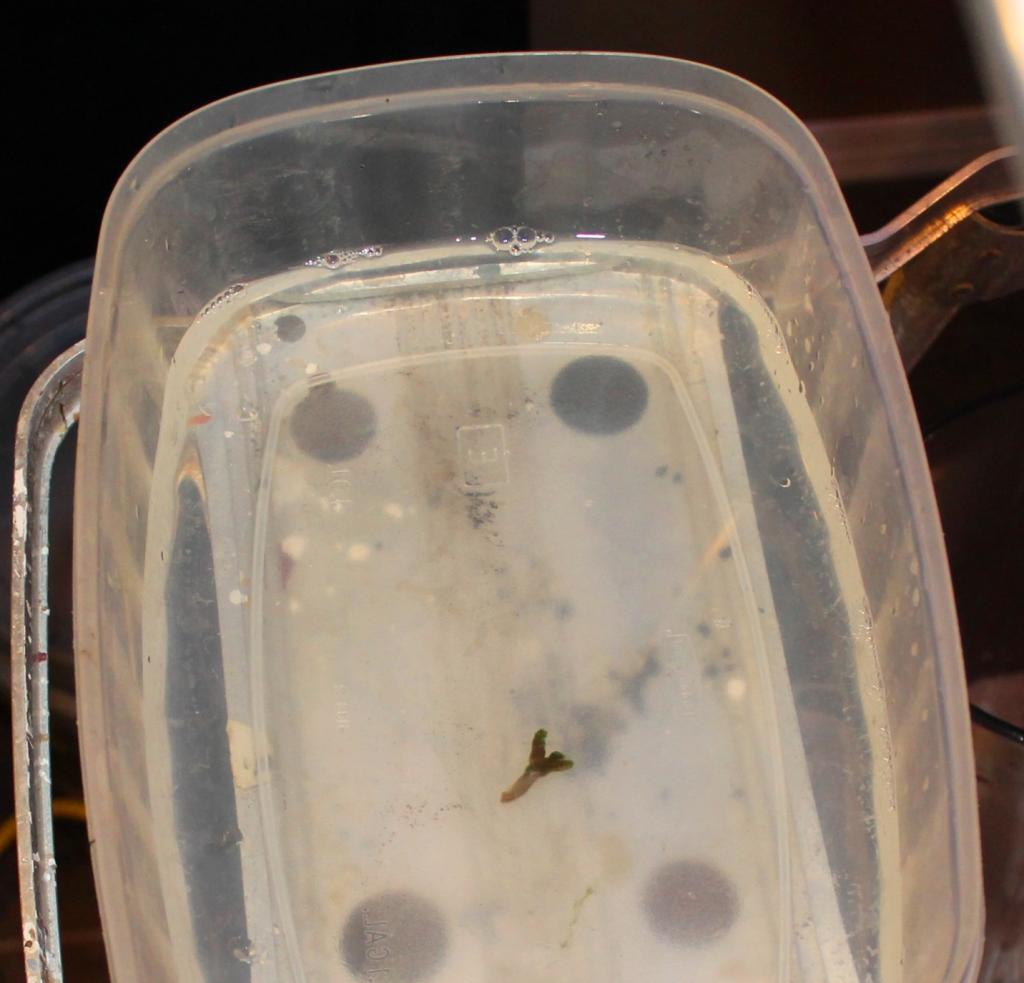
The below picture of the frag was taken after one day after being fragged
The below was taken four days after being fragged. You can see the leather is starting to turn up-wards towards the light and is also starting to extend its polyps.

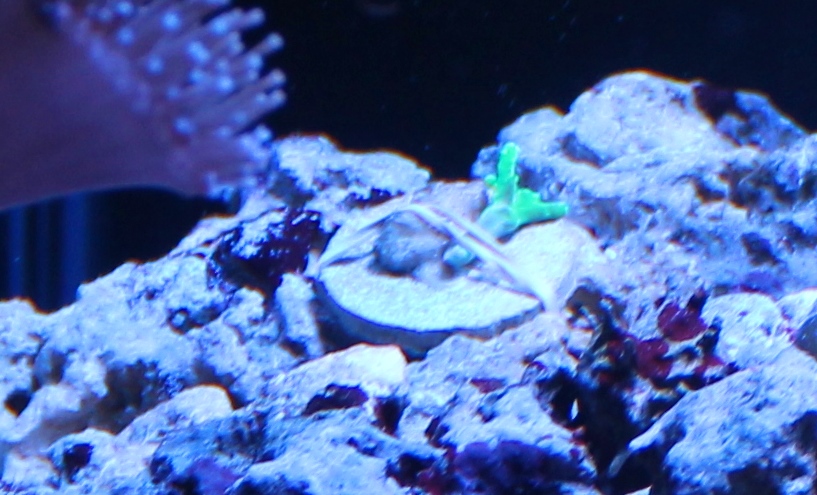
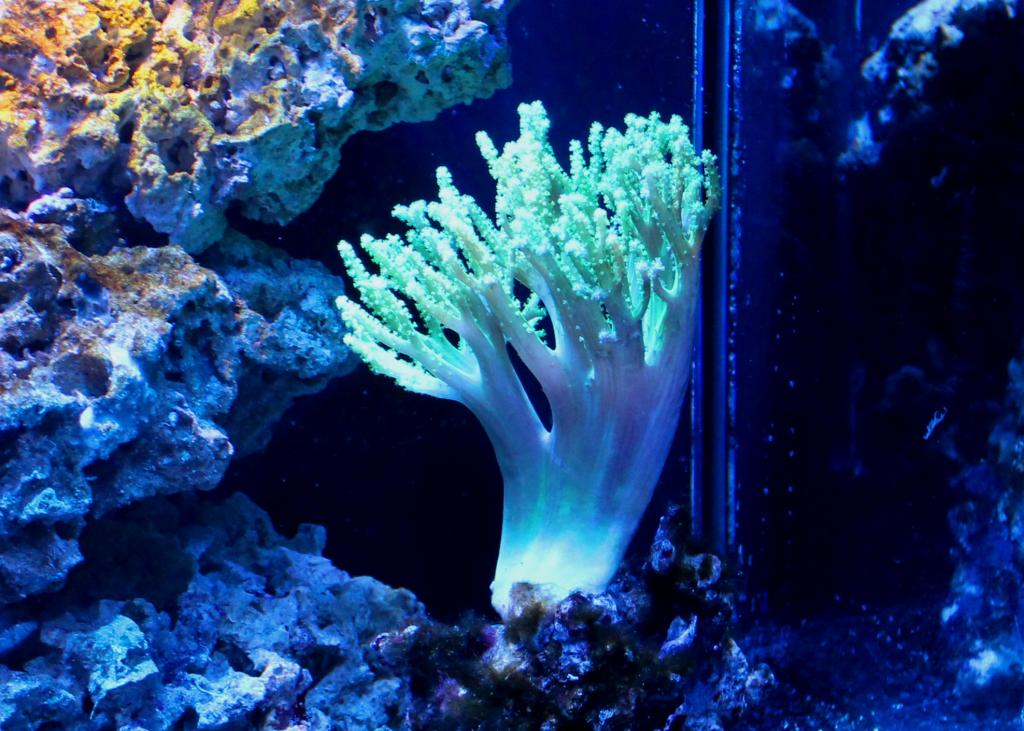
The below picture was taken 9 days after being fragged. The frag has already started to grow up-wards towards the light and looks like it is very close to becoming attached to the coral plug/
The next day after being fragged, the main leather has fully bounced back recovering from the process and looks to be in pretty good shape.
Tip of the Week #2
Beware of forums !!!
While forums are typically a great source of first hand knowledge, they can also be a pain in the backside for two different reasons.
When first starting and setting up your marine aquarium, your experience is limited. Even when you research more than enough, you still can make a mistake here and their when you are new to the hobby. Most of the time this is not a bad thing as there will be no permanent harm to your aquarium inhabitants and you will still be enjoying your aquarium in ignorant bliss, just like I had started started out in the hobby. However, if you unknowingly make a mistake to go to a forum to explain your situation and ask for advice, you will likely get a dozen or so people pointing out all of your mistakes. This can make it real easy to feel bad about yourself and limit your enjoyment you will get from your aquarium. Just keep in mind that almost all problems you will ever run into, can be corrected by applying a few basic and simple concepts. This hobby is not a “Black Art”.
Another reason for this warning is some hobbyist who have many decades of experience can forget they are talking to a newer or lessor experience hobbyist at times. This can make you feel like someone just explained to you how to build a watch when you only asked what time it was. Don’t get down on yourself when this happens, and it will happen. It can be easy to feel like you don’t know what you are doing when a fellow hobbyist tries to sum up his/her many many years of experience into a few paragraphs, just do your best to learn from the information. Once again, stick to the basics doing those well, and most every thing else will fall into place.
Also, I thought I would share the below links as I found them very interesting and I hope you will as well
http://blog.aquanerd.com/2013/05/diablo-dc3500-controllable-pump.html
http://blog.aquanerd.com/2013/08/vertex-aquaristik-sump.html
http://blog.aquanerd.com/2013/09/picture-of-the-week-mccoskers-flasher-wrasse-paracheilinus-mccoskeri.html